Welcome to Science In A Snapshot
Science In A Snapshot (SIAS) is a free, NGSS-aligned gallery of 200+ science photographs, each paired with complete instructional content for grades K–5. Every photograph is a phenomenon — a real-world observation that anchors scientific thinking, launches inquiry, and drives meaningful classroom discourse.
Behind each image you'll find grade-differentiated discussion questions, vocabulary, a full 5E lesson structure, interactive hotspots, downloadable PDFs, a shareable student view, and much more. Whether you have five minutes or a full period, SIAS adapts to your instructional context.
What Makes SIAS Different
Unlike a stock photo search or a generic image library, every photograph in SIAS was selected because it can anchor a specific NGSS performance expectation. The educational content — written by teachers and science educators — is built in from the ground up, not added as an afterthought. The same photograph serves a kindergartner noticing patterns and a fifth grader constructing evidence-based explanations, because the content is differentiated at six grade levels simultaneously — and available in English or Spanish at the tap of a toggle.
Who This Handbook Is For
This guide is written for K–5 classroom teachers, science specialists, and instructional coaches who want to use SIAS with confidence from day one. You don't need to be a science content expert — SIAS does the content-differentiation work for you.
How to Use This Handbook
This isn't written to be read front to back. Sections 02–15 explain how the site works; sections 16–19 are about teaching with it. Start wherever your question is:
- Teaching tomorrow? Section 02: Quick Start and Section 07: The Lesson Tab are enough to run a lesson.
- Want the discussion to go better? Section 16: Facilitating Science Talk, then Section 15 for classroom protocols.
- Planning a unit? Section 11: Storylines & Units and Section 18: Planning & Pacing.
- Coach or specialist? Section 05, Section 16, and Section 17 cover what teachers most often ask about.
- Evaluating SIAS for adoption? Section 08 for what ships with every photograph, Section 11 for standards, and Section 21 for the research base.
- Want a printed copy? Click Download as PDF at the bottom-right of the screen.
All educational content on SIAS — photographs, lesson plans, discussion questions, student views, and PDFs — is free to access. No subscription, no paywall, no per-download fee. Ever.
Quick Start — Your First 5 Minutes
You can be ready to use SIAS in your next class in under five minutes. No setup, no accounts, no prep. Follow these six steps.
- Open the site. Go to sciencesnapshot.com in any web browser — Chrome, Safari, Firefox, or Edge. No login is required to browse or view any educational content.
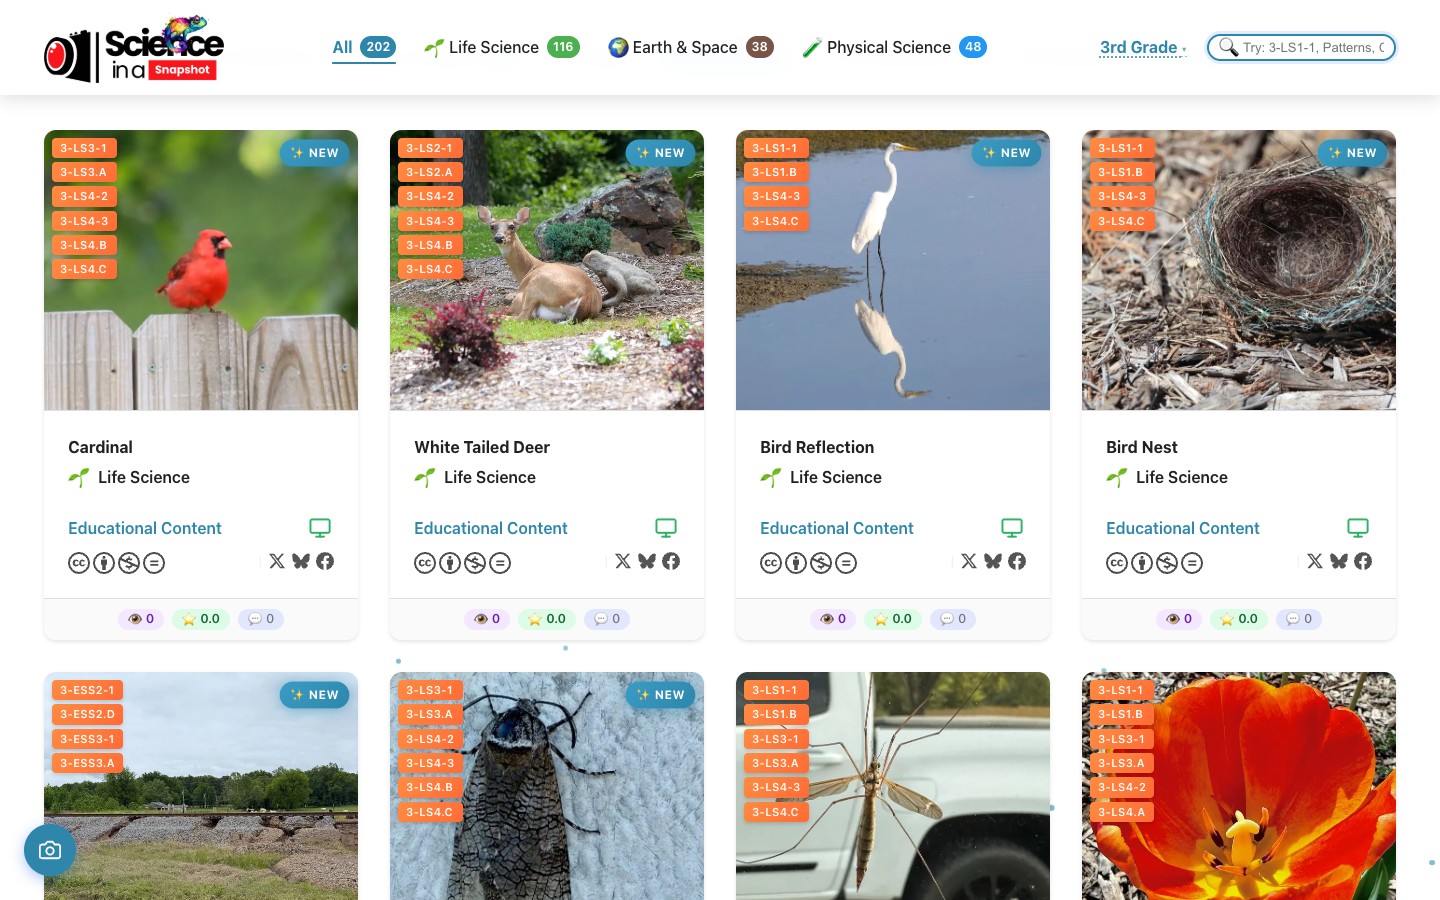
- Set your grade level. Find the grade selector in the top navigation bar (appears after you scroll past the hero). Click your grade: K, 1st, 2nd, 3rd, 4th, or 5th. All content updates immediately to match that grade.
- Browse the gallery. Scroll through the photo grid. Use the category tabs (Life Science, Earth & Space Science, Physical Science) to narrow the view, or type a keyword into the search bar.
- Open a photo. Click any thumbnail. A modal window opens showing the photo and its Lesson tab automatically.
- Explore the content. Read the phenomenon statement at the top of the Lesson tab, scan the discussion questions, and check the Downloads tab for ready-to-print PDFs.
- Share with students. Click the Student View button in the modal tab bar to get a shareable link your students can open on their own devices. No student accounts needed.
Project any photograph on your board, click Sentence Stems above the image, and give students 2 minutes to complete one stem in their science notebooks. This works on Day 1 with no preparation — and students immediately feel the pull of scientific thinking.
Navigating the Gallery
The SIAS home page has three distinct zones: a hero section at the top, a sticky navigation bar, and the gallery grid itself. Here's what lives in each zone.
Hero Section
The first screen you see when you arrive. It introduces the site and provides four starting points:
A short video introducing SIAS. Useful for sharing with colleagues, administrators, or parents at curriculum night.
An in-app guided walkthrough of every major feature. Highly recommended for your first visit — takes about 4 minutes.
Downloads a classroom reference guide: Phenomena in Grades K–5 — a concise overview of anchoring phenomena in science instruction.
Smoothly scrolls past the hero to the gallery grid — the fastest path to the photographs if you've visited before.
Sticky Navigation Bar
Once you scroll past the hero, a bar sticks to the top of the browser window. Working left to right:
- SIAS Logo — click to scroll back to the top of the page.
- Category Tabs — All | Life Science | Earth & Space Science | Physical Science. Clicking any tab filters the entire gallery instantly.
- Grade Selector — a dropdown showing K through 5th. This sets the grade for all content sitewide — it affects every photo you open until you change it.
- Search Bar — real-time search by keyword or NGSS code. Covered in detail in Section 04.
Gallery Grid
The main gallery displays photographs as cards. Each card shows the thumbnail, the photo's title, and its science category badge. Click any card to open the full educational content in a modal window.
Below the sticky nav, before the gallery, is a second filter row with Collections, Storylines, and SEP/CCC filter buttons. The SEP/CCC filters are covered later in this section; Collections and Storylines are covered in Sections 11–13.
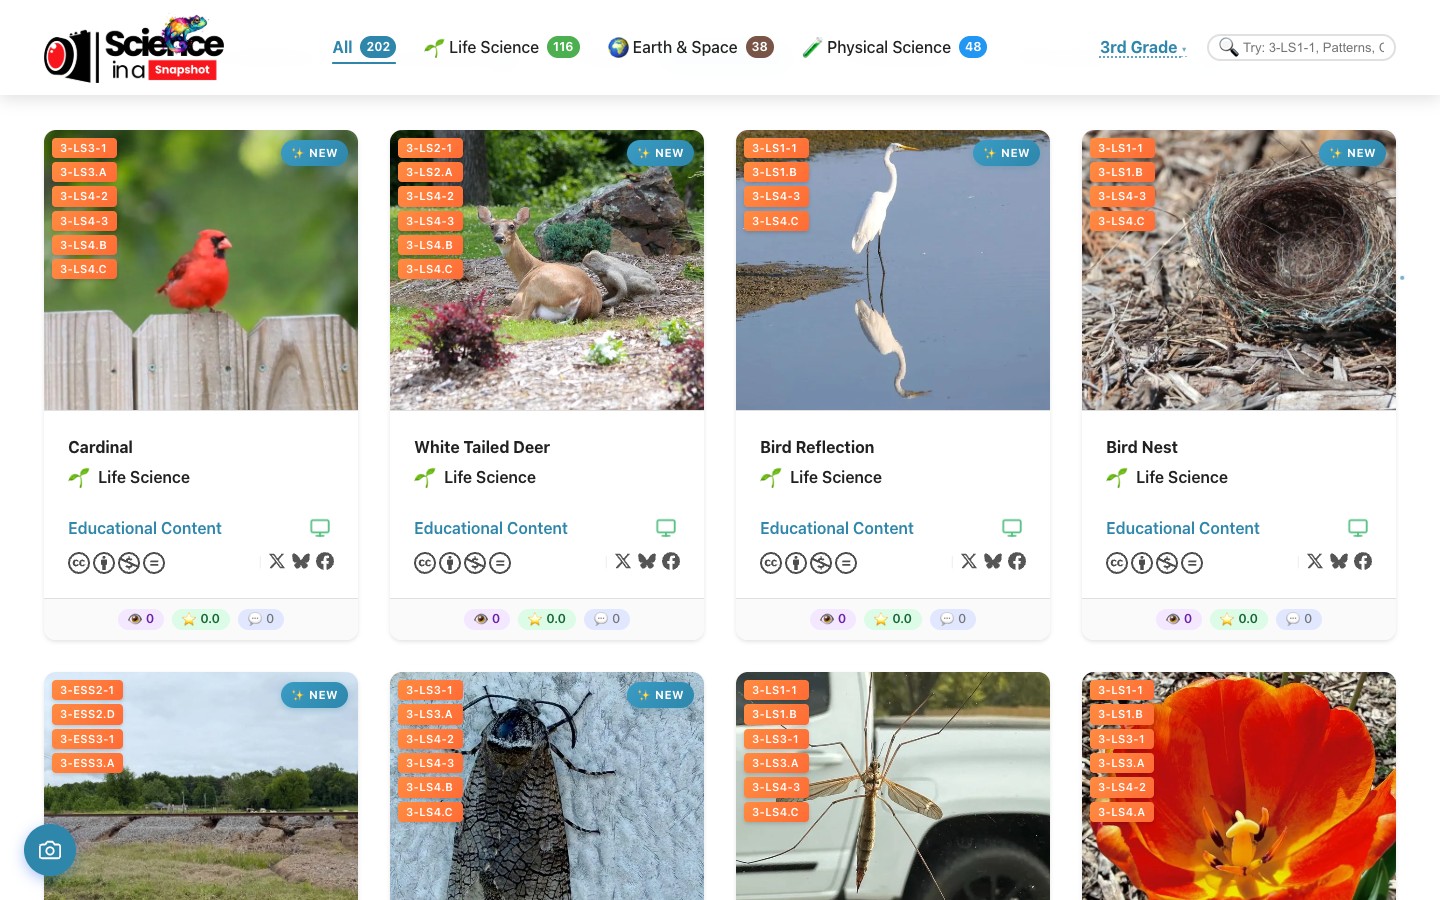
Select your grade in the nav, then bookmark the page. Your grade selection persists, so every time you open the bookmark you'll be immediately in the right grade view — no clicking required.
Search & Filter
SIAS offers multiple overlapping ways to find the right photograph for your lesson. Use search for speed, filters for precision, and sort to surface the most-used choices from the teacher community.
Smart Search Bar
The search bar handles two types of input simultaneously:
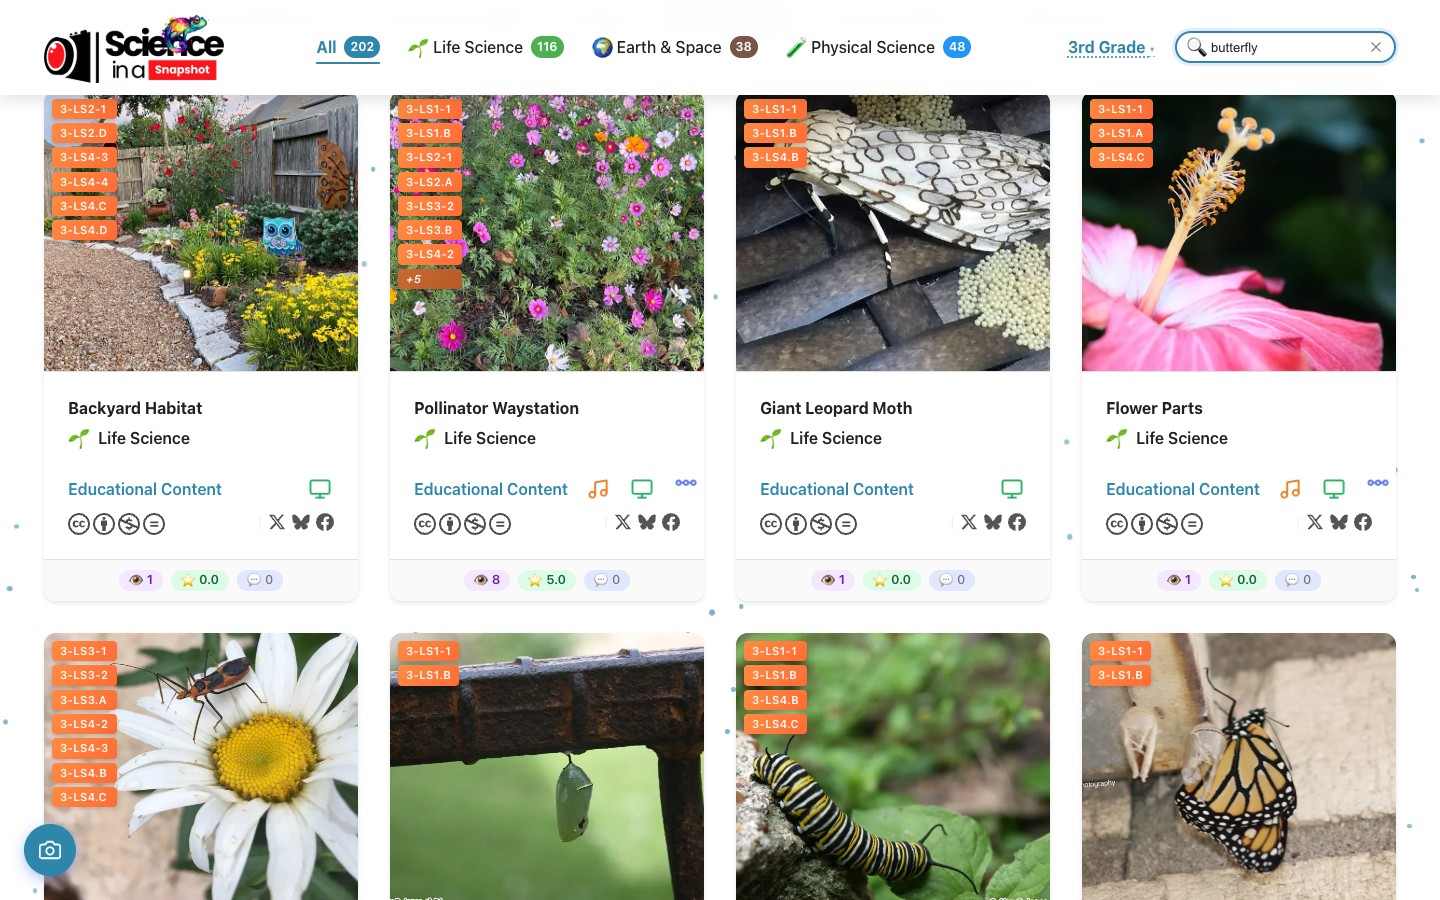
- Keywords — type any word that might appear in a photo's title or content (e.g., butterfly, erosion, reflection, seed). Results update as you type.
- NGSS Standard Codes — type a performance expectation code (e.g., 1-LS1-1, ESS2-1, PS4) and an autocomplete dropdown appears. Select a standard to filter the gallery to every photograph aligned to that expectation.
If you're planning a unit around a specific standard, searching by code is the fastest path to aligned content. Type the DCi abbreviation (e.g., LS1, ESS2, PS2) to browse all photographs touching that Disciplinary Core Idea without memorizing exact codes.
Science Category Filters
The three category tabs in the sticky nav filter the gallery instantly. Combine with search or the filters below for more precise results.
Crosscutting Concepts (CCC) Filter
In the filter row below the gallery header, click any of the seven NGSS Crosscutting Concepts to show only photographs tagged with that lens:
- Patterns · Cause and Effect · Scale, Proportion, and Quantity
- Systems and System Models · Energy and Matter
- Structure and Function · Stability and Change
Science & Engineering Practices (SEP) Filter
Similarly, the SEP filter lets you find photographs associated with specific practices — from Asking Questions and Defining Problems to Obtaining, Evaluating, and Communicating Information. Useful when you want to plan a lesson around a particular practice rather than a content standard.
Sort Options
The Sort dropdown lets you reorder the gallery in six ways:
- Newest First — recently added photographs at the top (default view)
- Oldest First — reverse chronological, shows the original collection
- Top Rated — community star-rating leaders first
- Most Viewed — most frequently opened photographs
- Most Popular — combined engagement score
- Has Song — filters to photographs that include an accompanying song resource
Active Filter Pills
When a filter is active, a pill appears below the filter row showing exactly what's applied. Click the × on any pill to remove that filter. This makes it easy to layer and then individually peel back filters without losing your place in the gallery.
Grade-Level Differentiation
Every photograph in SIAS carries six complete, distinct sets of educational content — one for each grade K through 5. Switching grades doesn't just simplify language; it fundamentally changes the cognitive demands, question structures, and instructional framing to match developmental readiness at each level.
Two Ways to Change the Grade
- Gallery-level selector (sticky nav dropdown) — sets the grade for all content sitewide. Affects the gallery and every photo you open until changed.
- Modal-level grade buttons — appear inside an open photo at the top of the modal. Click any grade button to switch that single photo's content in real time, without closing or reloading the modal.
What Changes By Grade Band
K–2 Band
- Phenomenon framed in concrete, observable, sensory terms
- Discussion questions focus on noticing and describing
- Vocabulary limited to 3–4 essential terms with simple definitions
- Engineering challenge uses familiar materials and simple design constraints
- Lesson scaffolds include more teacher-facilitation language
- Vocabulary activities use picture association and matching
3–5 Band
- Phenomenon includes mechanisms, cause-effect, and pattern explanation
- Discussion questions demand evidence-based reasoning and explanation
- Vocabulary expands to 5–7 domain-specific terms with scientific definitions
- Engineering challenge includes constraints, criteria, and iteration expectation
- Lessons include CER (Claim-Evidence-Reasoning) structure
- Vocabulary activities include flashcard and matching game modes
If you teach a split grade (e.g., 2nd/3rd), open the modal and use the grade buttons to switch between grades during discussion. Both groups engage with the same photograph and phenomenon — but you scaffold the thinking separately using grade-appropriate discussion questions from each view.
Read Above Grade Level, Assign At It
Children can understand text read aloud to them well before they can decode it themselves — which is why a read-aloud is usually pitched about two grade levels above the class, while anything students read independently sits on grade level. Because SIAS writes six versions of every photograph, you can do both from the same image without hunting for a second text.
In a third-grade room: switch to 5th, read that phenomenon statement aloud, and discuss it together. Then switch back to 3rd and let students read that version themselves, or hand out its PDFs. Same photograph, same phenomenon, two different jobs — and the vocabulary students met in the read-aloud shows up again at a level they can decode.
It works downward too. If several students need a lighter text load, opening the grade below gives you a genuinely simpler version rather than the same paragraph with a word swapped, and it never announces itself as the “easy” sheet.
Switching the Language (English / Spanish)
Next to the grade buttons at the top of every open lesson is an EN / ES toggle. Tap ES and the lesson — photo description, phenomenon, core concepts, discussion questions, and vocabulary — re-renders in Spanish, instantly and in place, at whatever grade level you're viewing. Tap EN to switch back. The toggle appears on photo lessons, video lessons, and the Student View, and your choice carries over from one lesson to the next until you change it.
- Whole-lesson translation — not just labels. The student-facing science reads naturally in Spanish for the grade level shown.
- Bilingual vocabulary — science terms appear in Spanish with the English term in parentheses, e.g. fotosíntesis (photosynthesis) — building academic language in both languages at once.
- Standards stay in English — NGSS codes and performance-expectation text are left untranslated so they match the standards documents teachers reference.
- Graceful fallback — if a Spanish version isn't available for a particular lesson, it stays in English rather than showing a gap. New photos and videos are translated automatically as they're added, online and in the offline desktop app.
The Spanish translations are AI-generated, like the rest of the lesson content. They read well and preserve the science, but — as with all AI-generated material — give a lesson a quick review before relying on it, especially in a bilingual classroom.
Photo Viewer & Hotspots
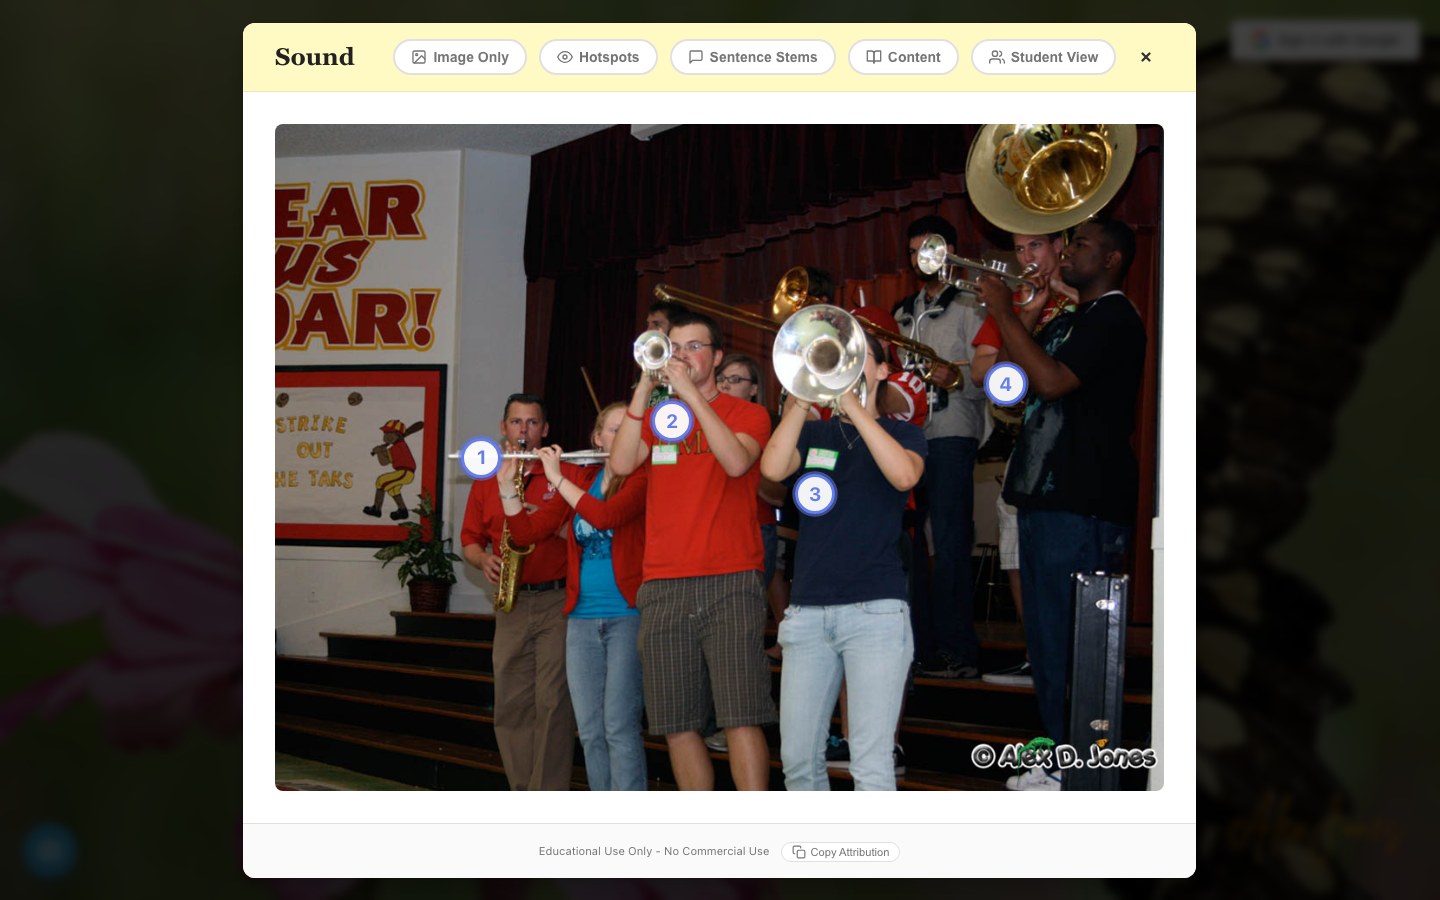
When you click a photograph, a modal window opens. The lower portion of the modal contains the Photo Viewer — an interactive image panel with several overlay modes, controlled by a row of toggle buttons above the image.
Viewer Toggle Buttons
- Image Only — displays the photograph with no overlays. Ideal for initial silent observation ("What do you notice?") before introducing any labels or structure.
- Hotspots — enables numbered, interactive dots placed directly on significant parts of the photograph. Click any dot to reveal a labeled tooltip with a scientific fact about that feature.
- Sentence Stems — overlays language scaffolds on the image, designed to lower the barrier to scientific observation and discourse. Three sets of four, one per discussion phase; see below.
- Student View (also a tab bar button) — toggles a preview of what students see on the Student View page.
- Content — opens the educational content panel (the five tabs at the top of the modal).
Interactive Hotspots
Hotspots are numbered circles placed by science educators on scientifically significant parts of the photograph. They turn a static image into an annotated field diagram. A strategic teaching sequence:
- Show the image in Image Only mode. Ask: "What do you notice? What do you wonder?"
- Switch to Hotspots. Ask students to predict what each numbered dot might label before you reveal it.
- Click a dot to reveal the label and scientific fact tooltip. Connect the vocabulary to the Vocabulary section in the Lesson tab.
- Ask: "Did any hotspot surprise you? Which one connects to something you already knew?"
Sentence Stems Overlay
This overlay gives students the words. It carries three sets of four stems, one for each phase of a science discussion (Section 16) — switch between them with the tabs at the top of the card. Every stem is available in English and Spanish, following the EN / ES toggle.
Observe & Wonder — opening a discussion
- "I notice ______, and I wonder ______."
- "This reminds me of ______ because ______."
- "If I could ask this [plant/animal/object] one question, I'd ask ______."
- "One thing that might be changing here is ______."
Share Evidence — after an investigation
- "I think ______ and my evidence is ______."
- "We observed ______. What did your group observe?"
- "I'd like to add on to what ______ said, because ______."
- "What is your evidence for ______?"
Agree & Decide — reaching consensus
- "I agree with ______ because ______."
- "I disagree with ______ because ______."
- "I'm not sure yet about ______. Can you help me understand?"
- "We all seem to be saying ______."
The Lesson tab shows all three sets stacked, so you can read the whole progression while planning. The overlay shows one at a time, because it is meant to be projected.
Project the photo with Sentence Stems enabled. Ask students to choose one stem and complete it in their science notebooks. Give 2–3 minutes of silent writing, then a pair share. This routine requires zero preparation and works with any photograph in the gallery.
Navigating Between Photos
Previous and next arrow buttons inside the modal let you move through the gallery without closing and reopening. Your current tab selection stays active as you navigate — a useful feature when running a Storyline sequence (Section 11) or comparing photographs.
The Lesson Tab
The Lesson tab is the default tab when you open any photograph and contains the richest instructional content on the site. It is designed to support a complete class session without requiring any additional materials.
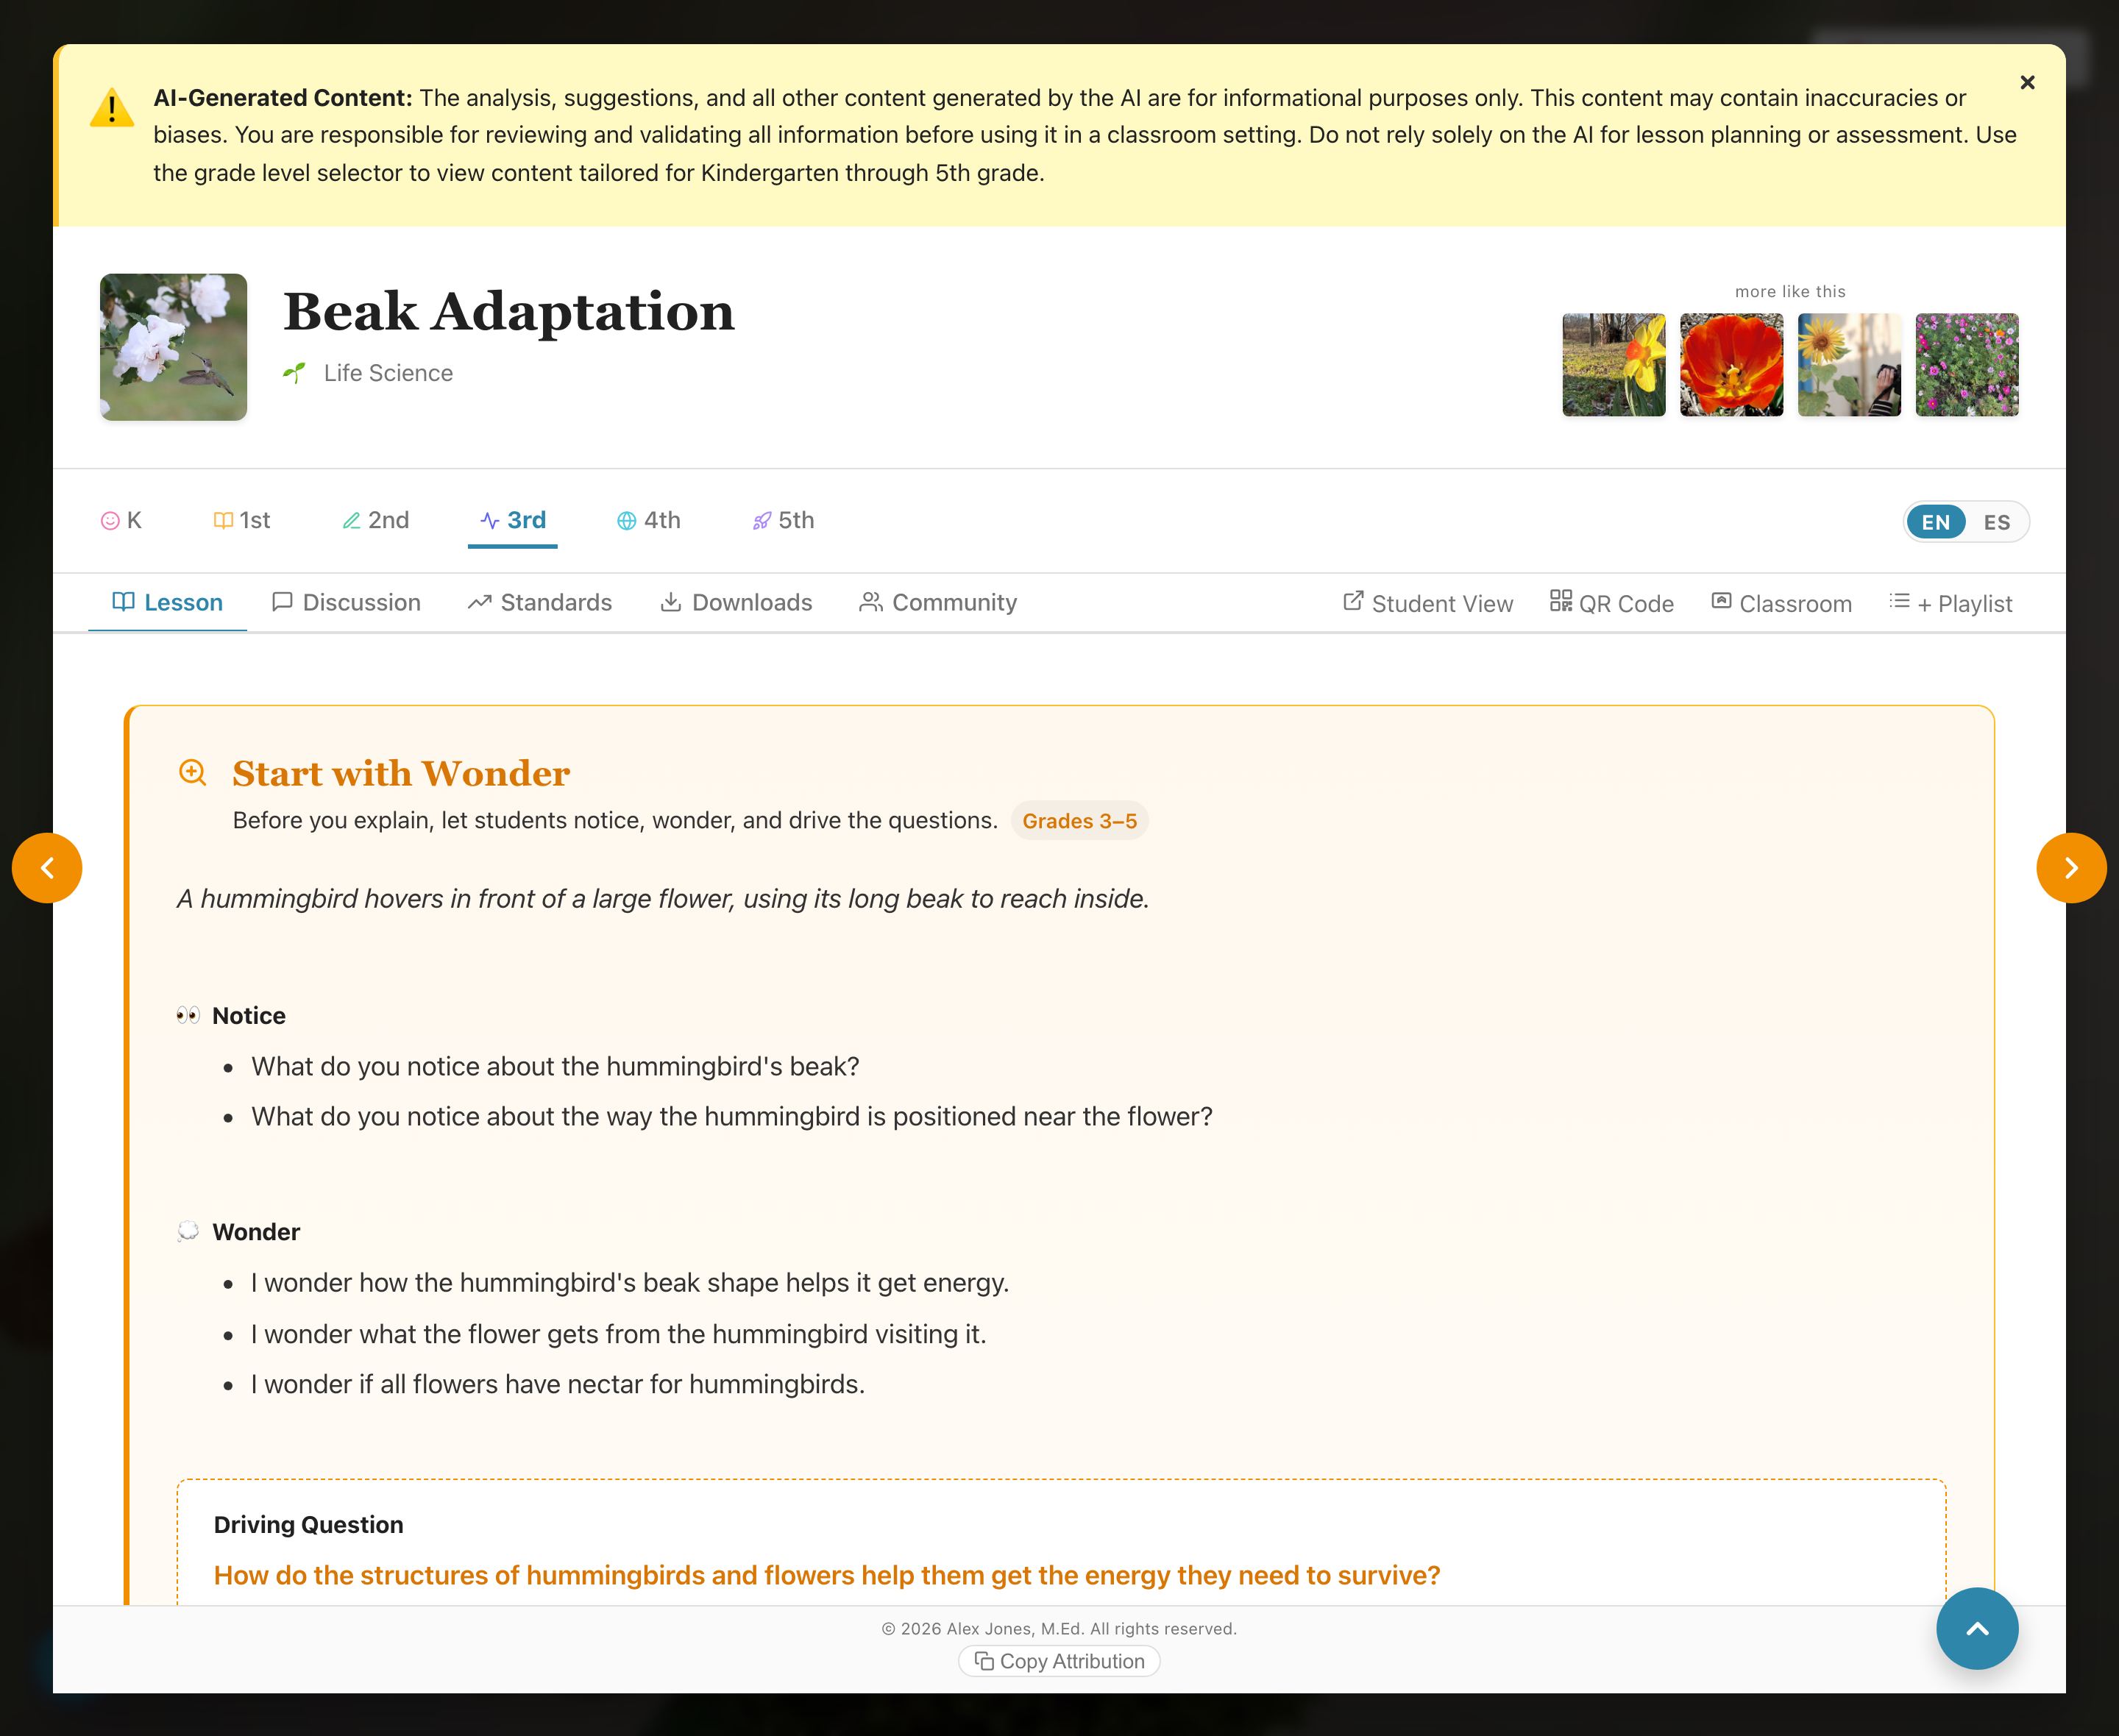
Start with Wonder (Notice & Wonder)
Every lesson now opens with a Start with Wonder band — a short, student-driven inquiry routine. Rather than explaining the science to students first, it invites them to observe the phenomenon, generate their own questions, and decide what to investigate. Use it in the first five minutes, before any content:
- Notice — open-ended observation prompts ("What do you notice about…?") that work at any grade.
- Wonder — sentence-started wonderings in the students' voice ("I wonder…") to surface curiosity.
- Driving Question — the single anchoring question this photo can launch a lesson around.
- Questions students might post — example questions in authentic kid voice, to seed a class Driving Question Board.
- Investigate next & Figure out — a concrete next step, plus a closing reflection to capture what was figured out and what new questions remain.
The band is grade-banded: it re-tunes automatically as you change the grade selector — concrete, everyday language for K–2, and science vocabulary with cause-and-effect reasoning for 3–5. A one-click link prints a blank Notice & Wonder T-chart so students can record their own observations and questions.
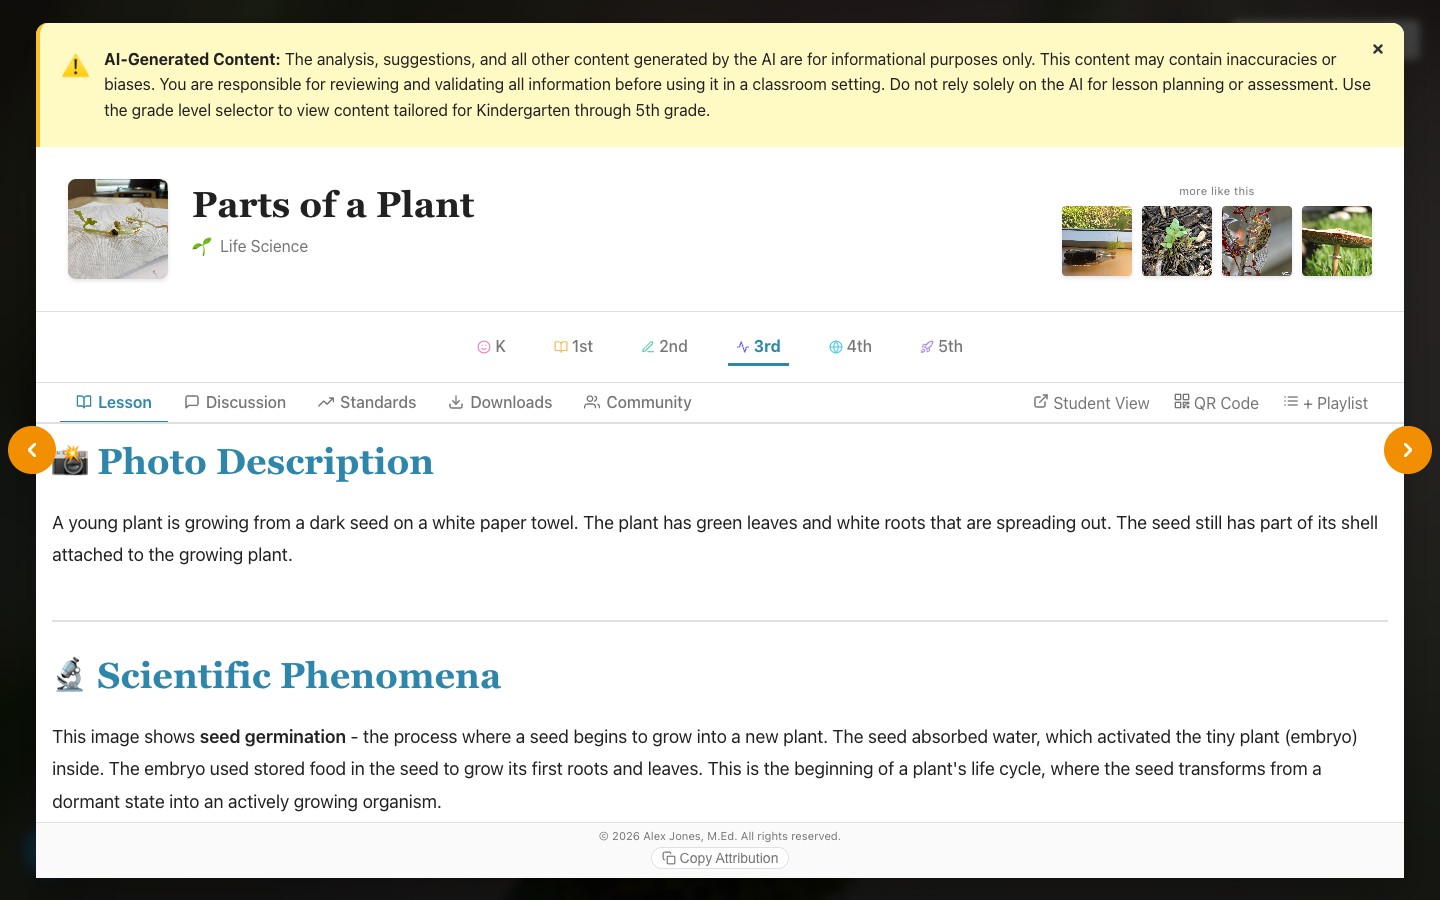
Phenomenon Statement
Each photo opens with a grade-level phenomenon statement — a brief, compelling description of what is happening in the photograph, written from a student's perspective and at the appropriate reading level. This is your discussion launch point. Consider displaying it on your board before showing the image, as a hook: "Let me read you something interesting before I show you the photo..."
5E Lesson Structure
Every photograph comes with a full 5E instructional framework. Each phase includes specific, photo-grounded activities — not generic instructions:
- Engage — hooks, phenomenon-based prompts, and prior knowledge activators
- Explore — hands-on or observation-based activities tied directly to the photograph and phenomenon
- Explain — teacher-facilitated sense-making, vocabulary instruction, and conceptual connection
- Elaborate — extension activities, real-world application, and cross-curricular connections
- Evaluate — assessment prompts, exit ticket questions, and reflection activities
Discussion Questions
Questions are labeled with Bloom's Taxonomy levels so you can intentionally scaffold cognitive demand during a class period — beginning with Remember/Understand to surface prior knowledge, then moving into Analyze, Evaluate, and Create for deeper discourse. Discussion questions are also available in their own dedicated tab (Section 08).
Teaching Tips
Specific, photograph-level guidance from science educators — common student misconceptions to address, productive struggle points to anticipate, and instructional moves that have worked especially well with that particular image.
UDL Strategies
Each lesson includes Universal Design for Learning (UDL) strategies addressing multiple means of representation, expression, and engagement. These allow you to reach learners with diverse needs without a separate modified lesson plan.
Cross-Curricular & STEM Career Connections
Every lesson ends with explicit connections to ELA (writing prompts, reading tie-ins), mathematics (measurement, data interpretation, patterns), and two or three STEM careers that relate to the phenomenon.
Each career carries more than a job title. There is a “Try it” task — roughly ten minutes, using what a classroom already has, aimed at the science practice that grade is working on — plus the tools of the trade, where people do that work, and a real, living scientist in that field with a line about what they actually study. The scientists are chosen by hand, not generated, and they deliberately span the world: Kenya, Ethiopia, Nigeria, South Africa, Brazil, Argentina, Chile, Peru, India, Jordan, Thailand and the UK alongside the United States.
Under most careers you will find a link like “18 more photos an ornithologist would study”. It filters the gallery to the other photographs whose lessons teach that same career — a quick way to build a set around one kind of scientist rather than one topic. A banner above the grid shows which career you are filtered to, with an × to clear it.
Two kinds of career show no link. One that appears in only a photograph or two has nothing to point at. One that appears in more than a tenth of the gallery — “biologist” is the obvious case — is too broad for the link to be a useful invitation, so it is left off deliberately rather than sending you to forty photographs.
Salary figures are real and sourced. Each is the median annual wage for a named U.S. occupation from the Bureau of Labor Statistics, refreshed every year, with the occupation named beside it — which is why several careers sometimes show the same figure, since the BLS does not always separate them. These are for your planning, not for the students: Student View shows what a job is, never what it pays.
Vocabulary Routine
The Vocabulary section carries a reminder to introduce terms after students describe the idea in their own words (rather than front-loading definitions), and to post them on a class Word Wall. Terms that recur across many lessons are tagged with a small "builds over time" badge, so you can flag the cross-cutting academic vocabulary students will keep meeting from Kindergarten through 5th grade.
The ordering is deliberate: don't pre-teach the vocabulary list before the lesson. A word is a label for an idea, and a label attached to an idea a student hasn't met yet is just a spelling word. Let them describe what they see — “the water turned into little drops on the cold glass” — and then give them condensation. They'll keep it, because it names something they already noticed.
Two kinds of words show up, and they behave differently:
- Words that build over time — evidence, pattern, model, engineer. These belong to doing science rather than to one topic, they carry the “builds over time” badge, and students meet them again every year. Keep these on the Word Wall all year.
- Words for this photograph — erosion, condensation, pollinator. Specific to the science in this image. These come down when the unit does.
Differentiation Tips
Every lesson now closes on 📚 Differentiation Tips — three sets of strategies written for that photograph at that grade, one for special education, one for English learners, and one for students ready for extension. Each strategy is a short card: what to do, and where it applies. English-learner cards name the WIDA proficiency band they suit (“Levels 1–2”, “All Levels”), and any card needing something beyond what is already in the room lists its materials.
This is the same content as the Differentiated Instruction PDF in Downloads, open on the page so you can read it while planning rather than downloading first. It follows the grade buttons and the EN / ES toggle like the rest of the lesson.
It replaced a section called External Resources, which listed children's books. Those titles were AI-generated, and enough of them turned out not to exist — a real author credited with a book nobody ever wrote — that no amount of checking made the list safe to hand a teacher. It was retired rather than repaired. If you had been using it, your library's catalogue and your school librarian are better sources than we could be.
The Lesson tab alone can support a complete 45–60 minute science period: phenomenon intro → 5E explore activity → discussion questions → vocabulary → evaluate exit ticket. No additional planning resources required.
Discussion, Standards & Downloads
Discussion Tab
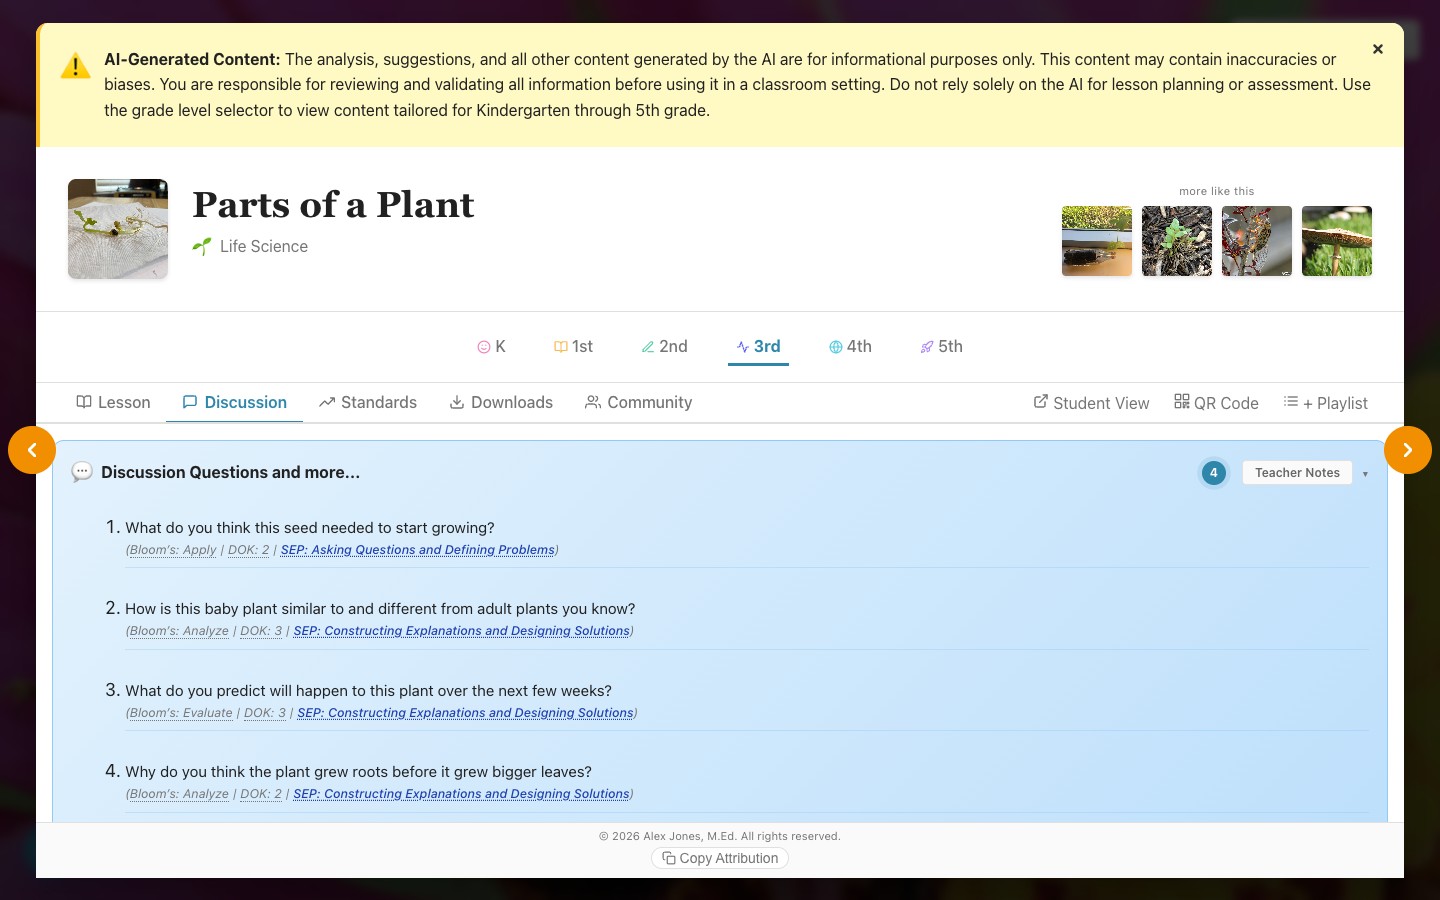
The Discussion tab surfaces the full grade-level set of discussion prompts with Depth of Knowledge (DOK) and Bloom's Taxonomy classifications labeled on each question. Use this tab when you want to deliberately select questions at a target cognitive level, or to compare how the same phenomenon is interrogated differently across DOK levels 1 through 4.
These prompts are ideal for structured Science Talk routines: whole-class discussions, small-group discourse, or partner think-pair-shares. The DOK labels help you scaffold a progression within a single class period.
List or Arc
A List / Arc switch sits in the Discussion tab header. List shows the questions in the order they were written. Arc reorders those same questions into the three phases of a discussion (Section 16) — Initial Ideas, Building Understandings, Consensus — sorted by cognitive demand, using the DOK and Bloom's labels each question already carries. Every question keeps its original number so you can find it again in the list.
Arc is a suggested running order. It doesn't decide that a given question “is” a consensus question — it sorts by how much thinking each one demands and cuts the list into three. Read it, then reorder in your head as your class requires. If the arc puts a question somewhere that feels wrong for your students, trust yourself.
Standards Tab
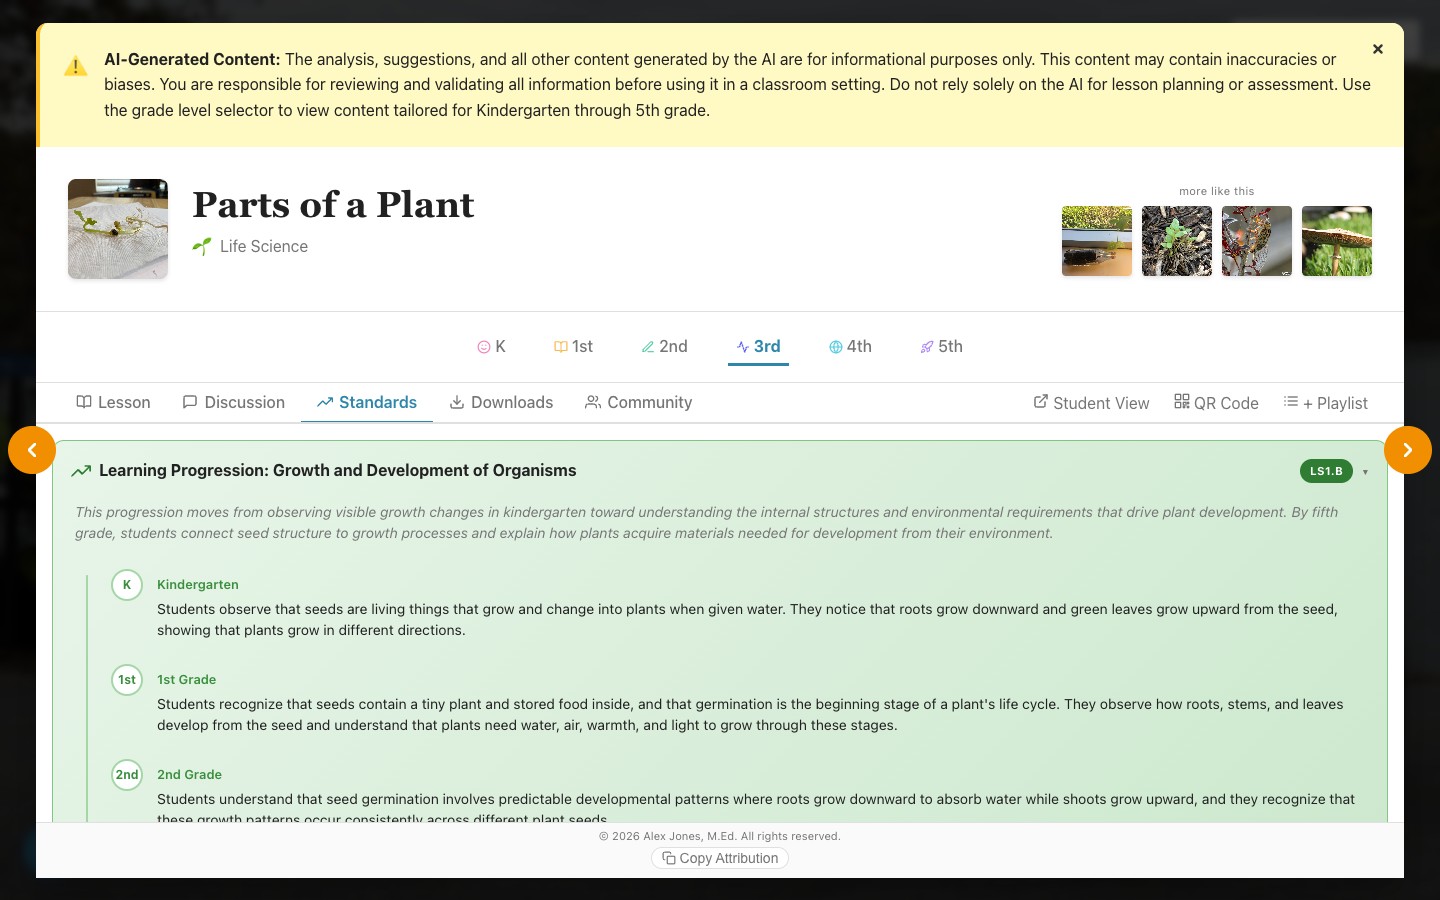
The Standards tab displays the complete NGSS alignment for the photograph, organized by:
- Performance Expectations (PE) — what students should be able to do as a result of engaging with this phenomenon
- Disciplinary Core Ideas (DCI) — the science content knowledge anchored by this image
- Crosscutting Concepts (CCC) — the thinking framework most applicable to reasoning about this photograph
- Science & Engineering Practices (SEP) — the practices this photograph gives students something real to do with
Each standard is a clickable link opening the official NGSS website entry for that expectation — useful for lesson plan documentation, administrator walkthroughs, and IEP/504 alignment documentation.
The tab also includes 3-Dimensional Learning Goals — one or two goals that braid a Science & Engineering Practice (SEP), a Crosscutting Concept (CCC), and a Disciplinary Core Idea (DCI) into a single "students will…" statement, each paired with a short "Look & listen for" list of observable evidence to watch for during instruction. This gives you a three-dimensional formative-assessment target for the lesson at a glance.
Under each of those two badge rows is a small Ask about this link. Open it and you get, for every concept and practice the photograph carries, one line naming what that dimension is really asking and four questions you can put to the class straight away — “What would come next if this kept going?” for Patterns, “What evidence would change your mind?” for Engaging in Argument from Evidence. They are yours to say out loud, not a worksheet, and they are written in English and Spanish. Where a practice has a matching set of student sentence frames, the panel says so and points you to it rather than repeating it — see Section 16 for those, and for the eight talk moves that go with them.
Downloads Tab
Every photograph includes a set of ready-to-print PDFs. Downloading asks for a free Google sign-in the first time (reading every lesson on screen never does). Download All Resources at the top of the tab grabs the lot as a ZIP, sorted into Teacher/ and Student/ folders.
Roughly half of these are teacher documents and half are student handouts — plus one, Take It Home, written for a family rather than for a classroom. Two of them defy their names. The Quick Check Probe prints “For student use” on its first pages but carries the answer key on its last — it is a combined document, so photocopying the whole thing hands students the answers. The Engineering Challenge is likewise a teacher document. Every PDF states its own audience in the footer bar at the bottom of each page; when in doubt, look there.
Teacher documents
- Lesson Guide — the complete lesson as a formatted, printable teacher document
- 5E Lesson Plan — the full 5E arc with facilitation notes and materials list
- Engineering Challenge — the engineering design problem with its criteria, constraints, and suggested materials, plus a Safety section with task-specific reminders (adult supervision, eye protection, safe handling of tools and small parts). Teacher-facing: hand students the challenge verbally or on your own slide.
- Rubric — a grade-specific scoring rubric for the exit ticket and written explanations
- Differentiated Instruction — three strategies each for special education, English learners, and students ready for extension, specific to that photograph
- Talk Moves — a reference card of eight discussion moves (Elicit, Probe, Restate, Reason, Challenge, Connect, Wait, Synthesize). Not photo-specific; print it once and keep it by the board. See Section 16.
- EL Strategies — one page of the support moves that recur most across the whole library, grouped by what each is for: getting in, getting it out, thinking together, showing the content. Not photo-specific; print it once and keep it by the board. It follows the EN / ES toggle. Every photograph still carries its own strategies — see Differentiated Instruction below and Section 15, and /ell for the research behind them.
- Quick Check Probe — a short misconception probe plus the teacher answer key, misconception explanations, and teaching tips. Copy only the probe pages for students.
- Writing Teacher Guide (grades 3–5) — the same three prompts with their standards codes, suggested three-session pacing (plan, draft, revise), a level 4 anchor paper for each prompt to calibrate your scoring, common pitfalls specific to that photo’s science, and the analytic rubric.
Student handouts
- Vocabulary Flashcards — term + definition + grade-level sentence, print-and-cut ready
- Notice and Wonder — a blank T-chart for the opening inquiry routine (Section 07)
- Discussion Stems — all twelve student sentence stems on one page, grouped by discussion phase. Print for desks or notebook covers. Not photo-specific, and it follows the EN / ES toggle — switch to Spanish and you get the Spanish card. See Section 16.
- Exit Ticket — a short end-of-lesson check with blank answer space, scored against the Rubric above
- Self-Reflection — a four-quadrant reflection grid students fill in for themselves; not for grading
- CER Scaffold (grades 3–5) — a claim–evidence–reasoning writing frame built on the photograph
- Writing Packet (grades 3–5) — a student packet aligned to the Common Core writing standards, built on the photograph. Three prompts are offered so you can choose the mode that fits your unit: informative/explanatory (W.2), opinion (W.1), and narrative (W.3). Each names a real audience and format — a field-guide entry, a letter to a park ranger — because writing for someone is what the standard actually asks for. The packet includes a planning organizer, sentence starters, the linking words that grade’s standard names, an open drafting page, a self-check list, and the full scoring rubric. Grades 4 and 5 also get a short leveled source text, since W.4.9 and W.5.9 require drawing evidence from a text and a photograph alone doesn’t satisfy that.
Family handout
- Take It Home — a one-page family activity written to the adult at home rather than to you, with a K–2 page and a grades 3–5 page in the same file. Its card is green-edged, and “Download All” files it under
Family/. It follows the EN / ES toggle: switch to Spanish and you get the Spanish sheet. Nothing is bought, nothing is turned in, and nothing is graded. It closes with a question the child asks an adult at home — one their family can answer and the school can’t. See Section 15 for what to do with what comes back.
Google Workspace
Below the PDF tiles sit four cards that don’t download anything: Save to Drive (one PDF), Save All to Drive (the whole set into a folder named for the photograph), Export to Slides (the lesson as a slide deck) and Export to Docs (the lesson as an editable document). They also use your Google sign-in, and they only appear on the website — the desktop app has no Google connection.
The student packet shows all three writing prompts with a checkbox beside each — mark the one you’re assigning before you copy. Students and you score from the same rubric: it’s on the last page of the student packet and in the teacher guide, so a student can see exactly what separates a 3 from a 4 while they’re still revising.
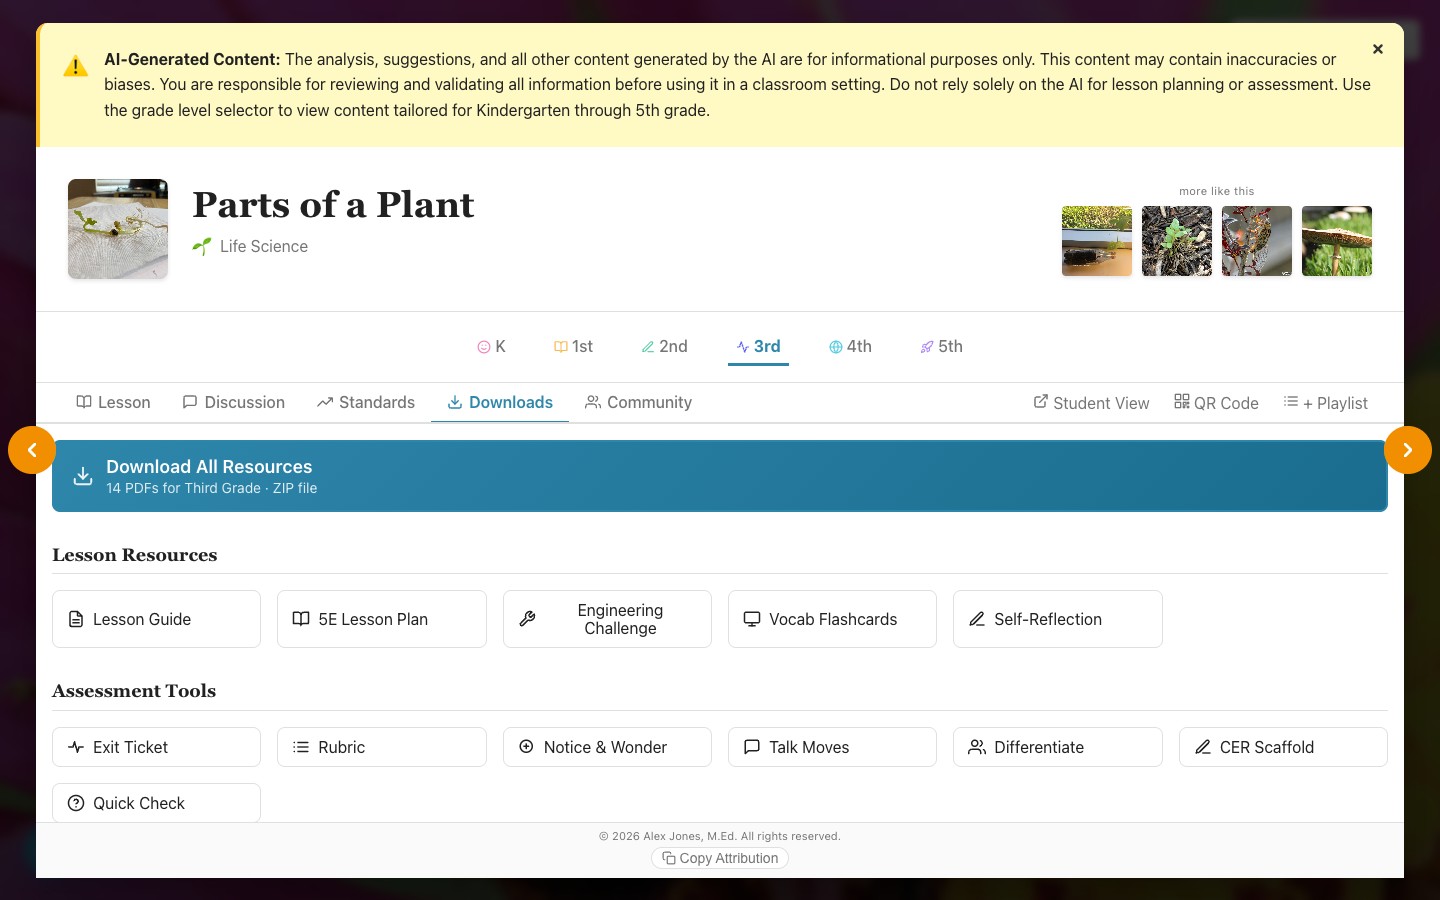
All PDFs are also accessible as direct download links you can post in Google Classroom or any LMS. Students can open them on-device as digital documents — no printing required.
Student View
Student View is a simplified, student-facing version of the photograph experience. It presents the core interactive experience — hotspots, discussion questions, vocabulary activities, engineering challenge, and more — in a clean, age-appropriate interface, without the teacher-only content (full 5E lesson, teaching tips, UDL notes, standards).
Students need no account, no download, and no login — just a URL or a QR code.
How Teachers Access Student View
- Open any photograph's modal.
- Click the Student View button in the tab bar (it has an external-link icon beside it).
- A preview modal opens inside the page, showing exactly what students will see.
- Click Open in New Tab to see the full experience, or Copy Link to get the shareable URL.
What Students See
- The photograph — full size, with optional hotspot dots and sentence stems overlay
- Discussion questions — grade-differentiated, numbered prompts
- Vocabulary section with two interactive modes:
- Flashcard Mode — flip through term + definition cards one at a time
- Match Game — drag vocabulary terms to match their definitions
- "Did You Know?" — the Zoom In / Zoom Out facts written for students, plus one STEM career connected to the phenomenon. Your planning material stays on your side of the lesson: the cross-curricular ideas and the salary figures are yours, not theirs.
- Engineering Design Challenge — the grade-appropriate design problem as a student prompt
- Related photographs — a small grid of similar photographs to explore independently
- EN / ES language toggle — students can read the phenomenon, discussion questions, and vocabulary in English or Spanish
How to Share With Students
- Google Classroom / LMS — paste the Student View URL as an assignment link. Students click it from the Classwork page.
- QR Code — generate a QR code (Section 10) and display it on your board or print it for stations.
- Projector — open Student View full screen on your board while students follow along on their own devices.
- Email or SMS — send the link directly to students or families for home use.
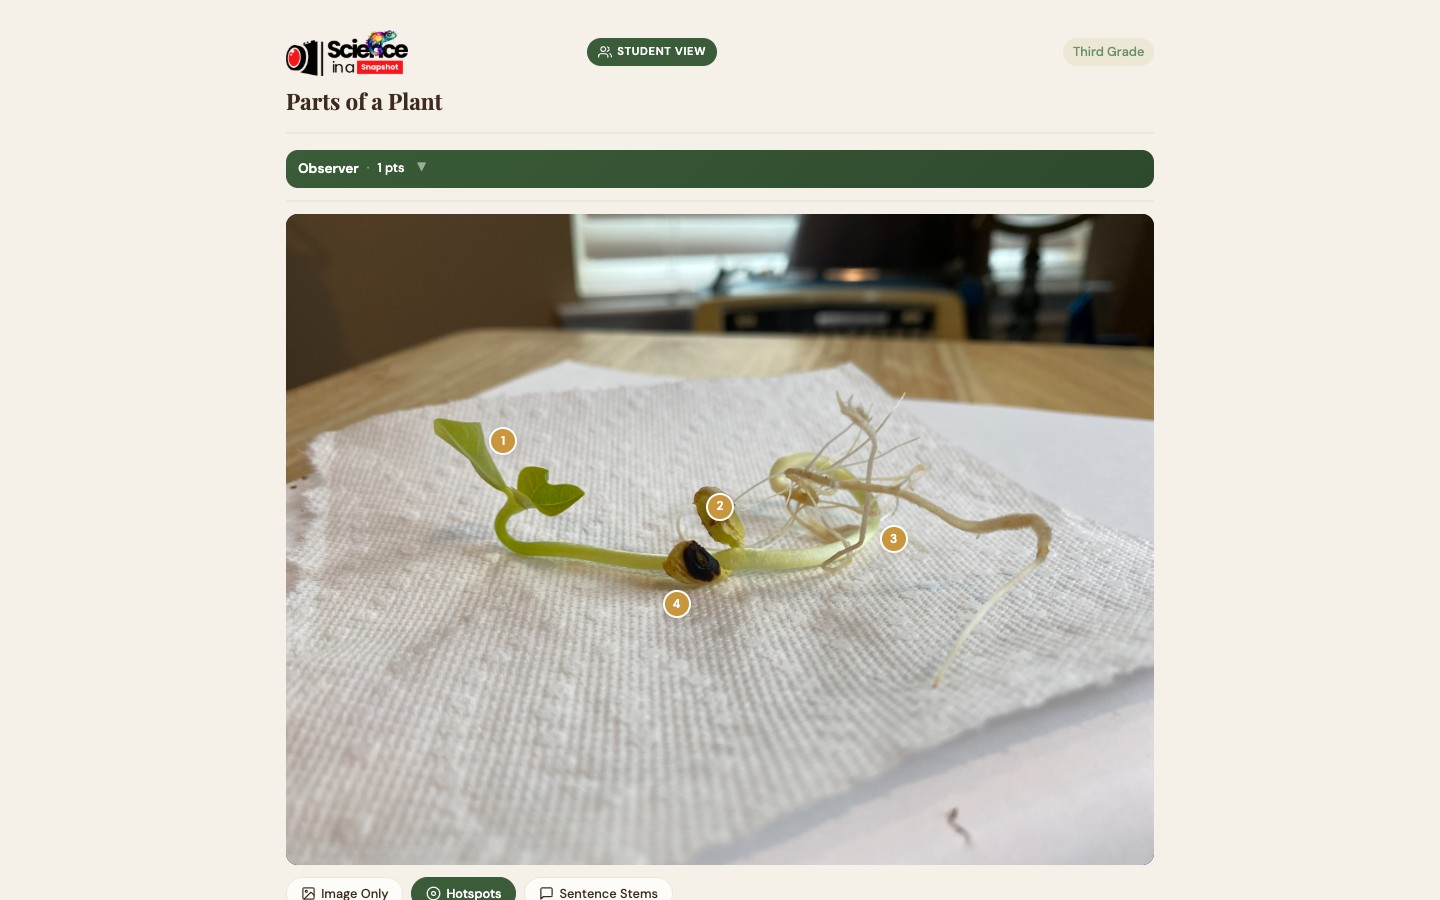
Student View is appropriate to send home. It contains no social features, no user accounts, no data collection from students, no external links, and no advertising. It is a clean, single-purpose science experience on any device.
QR Codes
Every photograph in SIAS can generate a QR code that links directly to its Student View at the currently selected grade level. QR codes bridge the gap between your physical classroom environment and digital content — no typing required from students.
Generating a QR Code
- Open any photograph's modal.
- Click the QR Code button in the tab bar (next to Student View).
- A QR code appears linking to this photo's Student View at the current grade.
- Screenshot it (Cmd+Shift+4 on Mac, Windows+Shift+S on PC) or use your browser's print function to print just the modal content.
Classroom Uses for QR Codes
- Station Rotation — print a QR code card at each science station. Students scan with their device at each stop to access the photograph and questions independently.
- Choice Boards — create a 3×3 choice board with QR codes linking to different phenomenon photographs for student-directed inquiry exploration.
- Science Notebook — attach a QR code to the inside cover of student notebooks linking to the current unit's anchor phenomenon.
- Parent Communication — include a QR code in your weekly newsletter so families can explore the current phenomenon together at home.
- Slides — embed a QR code in your Google Slides presentation so students who need to revisit content can self-direct independently.
- Field Trip Prep — print QR codes linking to phenomenon photographs that preview what students will see on an upcoming visit.
Modern smartphones, iPads, and Android tablets scan QR codes natively through the camera app — no additional QR scanner app required. Chromebooks with cameras also support QR scanning through the camera app.
Storylines & Six-Week Units
A Storyline is a curated sequence of 3–7 photographs that together tell a connected science story — building conceptual understanding of a specific NGSS performance expectation across multiple phenomena. SIAS currently includes 18 pre-built Storylines, with more added throughout the year.
Storylines are ideal for unit anchoring: use one across 1–2 weeks, returning to a new photograph each day or each class session, with the sequence driving the conceptual arc from initial noticing to evidence-based explanation.
Accessing Storylines
- Click the Storylines button in the filter row beneath the gallery header. A badge on the button shows the current count of available Storylines.
- A dropdown appears listing all available Storylines, each showing its title and the number of photographs in the sequence.
- Click View Guide to download the Storyline Teacher Guide PDF — a complete unit planning document with sequencing rationale and inter-photo discussion connectors.
- Click Start to open the first photograph in the sequence and begin the guided journey.
What's in a Storyline Teacher Guide
- The sequence rationale — why these photographs are ordered this way and what conceptual arc they build
- Driving questions that span the full sequence and return to each photograph
- Discussion connectors between photographs ("Yesterday we saw X... today's photo shows Y... what's similar? what's different? what new questions do you have?")
- Unit-level vocabulary progression — which terms are introduced when and how they build on each other
- Suggested pacing and grade-band adaptation notes
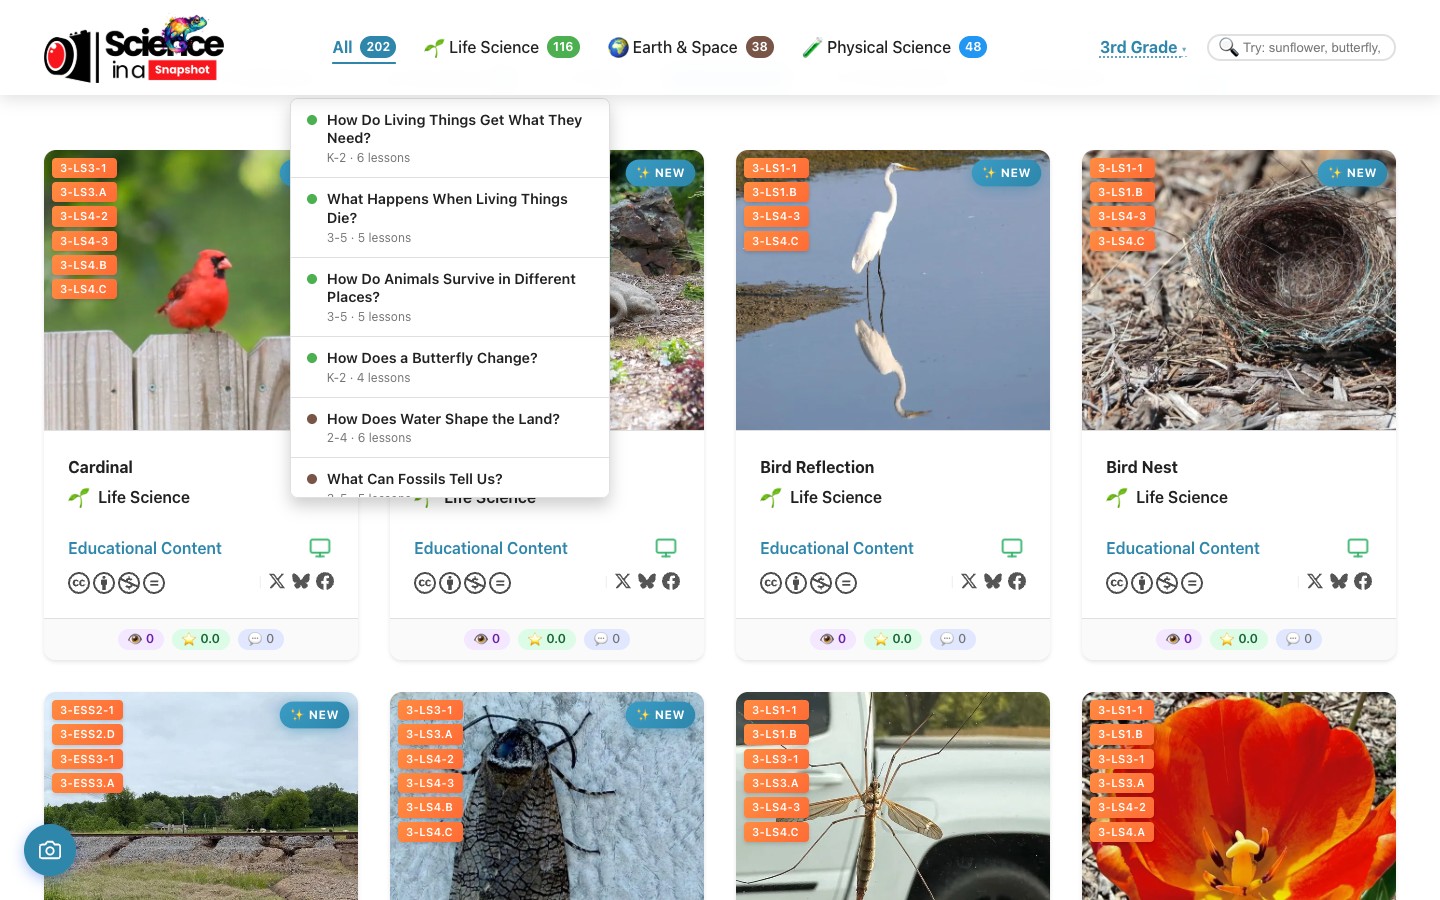
Download the Storyline Teacher Guide before starting the sequence. It shows you how each photograph builds on the previous one conceptually — transforming a daily warm-up routine into a coherent unit arc, without requiring additional unit planning from you.
Six-Week Units
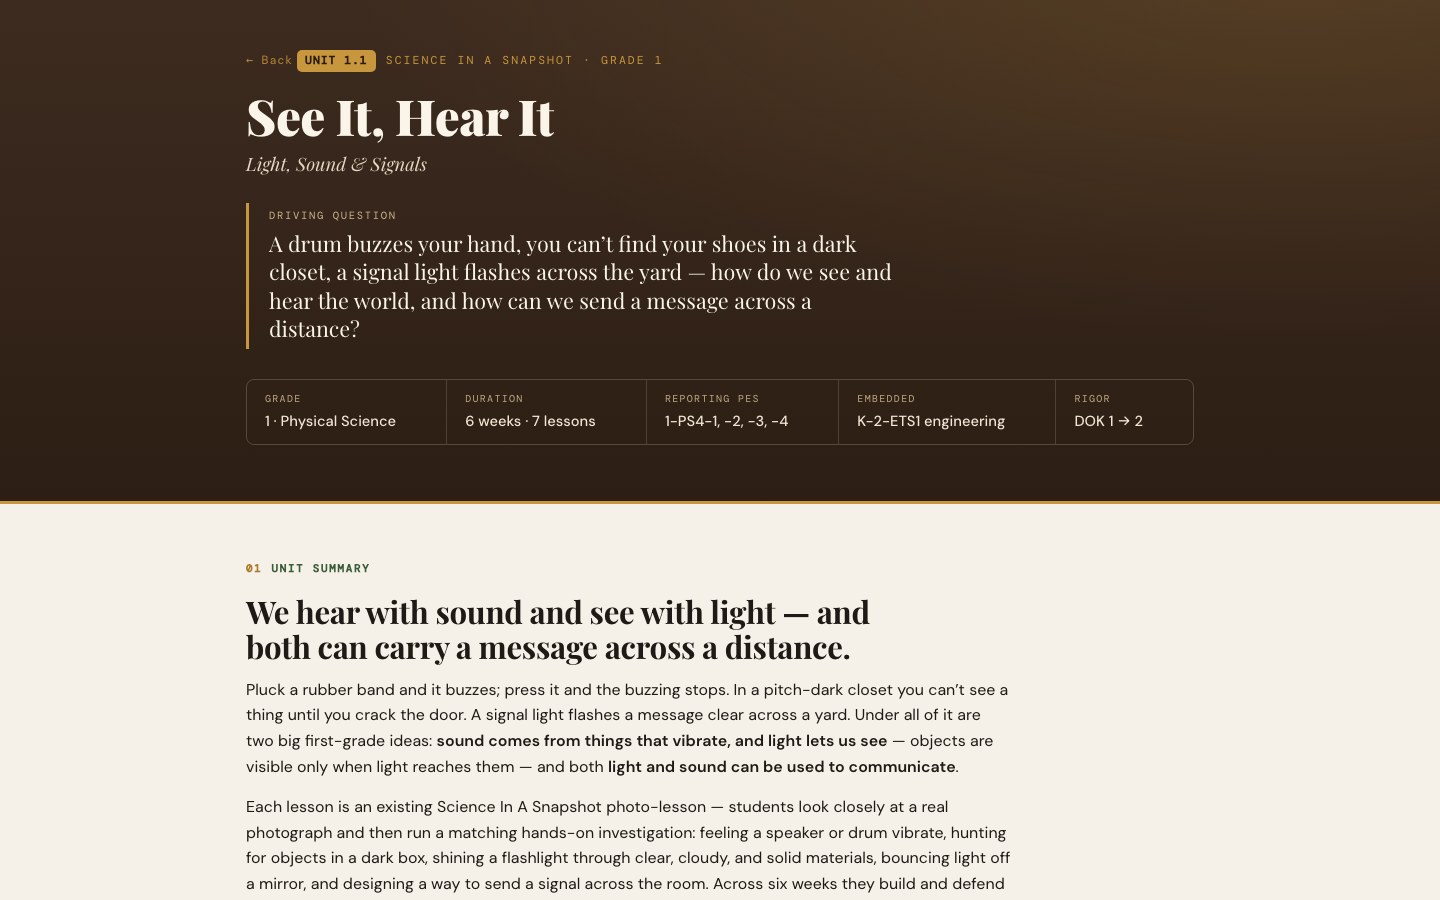
Where a Storyline spans a week or two around a single performance expectation, a Six-Week Unit is a complete, ready-to-teach arc for a full grade-level topic. Each unit assembles the relevant Storylines, individual photographs, and video phenomena into one coherent six-week sequence — anchoring phenomenon, guided investigations, an engineering or design task, and a culminating application — so the conceptual through-line is planned for you.
The units are organized by grade band, Kindergarten through Grade 5. Each opens to a dedicated page with its driving question, a week-by-week pacing map, the sequenced lessons, and a downloadable unit-planning guide.
You may notice a photograph you recognize from another unit. That is deliberate: a photograph that teaches two sciences can anchor a lesson in each — the same image doing energy work in one unit and wave work in another, with a different lesson behind it each time. Within a single unit, though, a photograph appears only once, so a six-week sequence never repeats a picture on you.
The Six-Week Units are built on the Arkansas K–5 Science Standards, which are closely aligned to the Next Generation Science Standards (NGSS). Because the two frameworks share the same three-dimensional architecture — disciplinary core ideas, science and engineering practices, and crosscutting concepts — the performance expectations and instructional sequences transfer directly for educators in NGSS and NGSS-adopting states.
Accessing the Units
- Click the Units button in the site header, or visit the Units index.
- Choose a grade band to see its available units, each showing its title, discipline, and the phenomena it covers.
- Open a unit to view its driving question, six-week pacing map, and sequenced lessons — then download the printable unit-planning guide.
Custom Playlists
Beyond the pre-built Storylines, you can build your own custom photo sequences — called Playlists — and share them with students or colleagues. Playlists are useful for differentiating a unit, creating themed explorations for specific grade levels, or curating photographs for a special event like a science fair or family science night.
Building a Playlist
- Open any photograph's modal and click the + Playlist button in the tab bar. The photo is added to your playlist tray.
- A tray appears at the bottom of the screen showing the photos you've added and a count badge. Close the modal.
- Browse the gallery and add additional photographs to the tray using the same button in each modal.
- When ready, click Build & Share in the playlist tray to open the Playlist Builder.
In the Playlist Builder
- Drag to reorder — arrange photographs into your intended instructional sequence
- Name your playlist — give it a meaningful title that students will recognize
- Add teacher notes — attach a short note to each individual photograph with context, instructions, or a specific question to focus on
- Publish — generates a shareable link and QR code for the complete sequence
Playlists are excellent for collaborative unit planning. One teacher builds the playlist, publishes it, and shares the link in your team's shared planning document. All teachers on the team can then deploy the same sequence simultaneously — no extra work required from each person.
Collections & Favorites
The Collections button in the filter row opens a dropdown with four curated galleries alongside the main photo pool.
Photographs you've marked as favorites. Requires a free Google sign-in. Persists across sessions and devices.
Hand-picked sequences from the SIAS editorial team, often themed around a season, unit, or teaching moment. Updated regularly.
Science photographs submitted by teachers and approved through moderation. A growing community library of real classroom science moments.
Short science video clips with the same complete educational content structure as photographs.
Saving to Favorites
Click the heart icon on any photo card in the gallery or inside the modal to add a photograph to your My Collection. You must be signed in with your Google account for favorites to persist across sessions. Signing in is always free and always optional — all educational content remains accessible without an account.
A free account unlocks three things: saving favorites, submitting photos, and posting community comments. It never unlocks content that isn't already available — SIAS is, and will remain, fully free for all educational content without any account.
Community Features
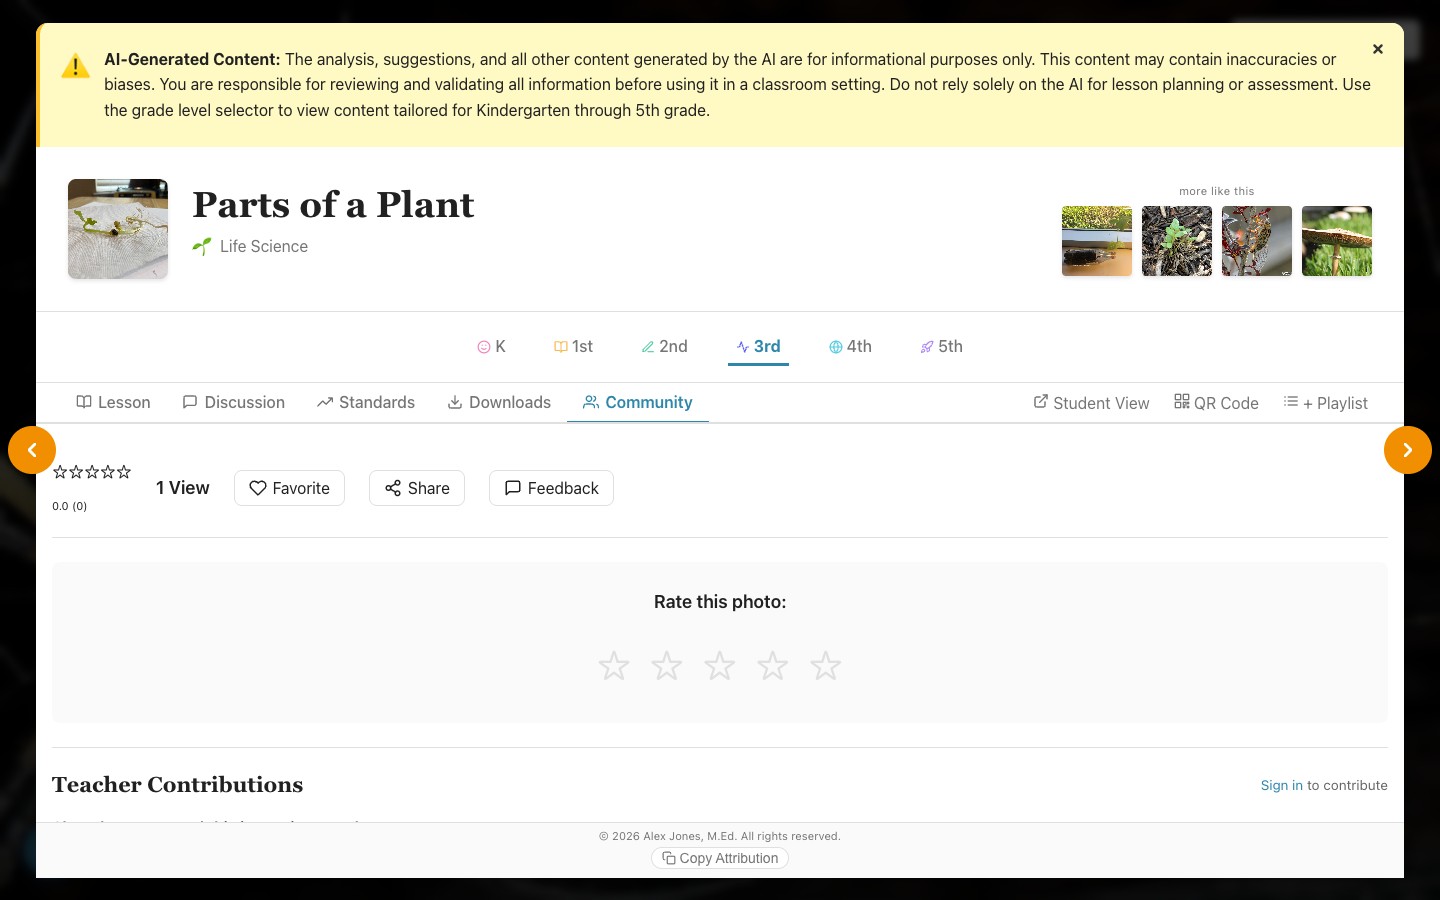
The Community tab — the fifth tab in any photo modal — connects you with other teachers who are using the same photograph. It contains ratings, comments, engagement stats, and attribution tools.
Star Ratings
Rate any photograph using the 5-star system in the Community tab. Ratings are aggregated across all users and displayed on photo cards in the gallery. Use the Top Rated sort option to surface the community's most-loved photographs for your grade and content area.
Teacher Comments
Leave a brief note about how you used the photograph in your classroom: your grade, what worked, how students responded, what surprised you. These community notes are often more practically useful than any editorial content — because they come from teachers in real classrooms like yours.
Copy Attribution
Every photograph includes properly formatted attribution information. Click Copy Attribution (in the modal footer) to copy a formatted citation to your clipboard. Use it in:
- Student handouts and worksheets
- Slide presentations and visual displays
- Parent newsletters that feature the photograph
- Lesson plan documentation for your records or administrator sharing
Submitting a Photograph
If you've captured a science photograph that you think would serve other teachers well, use the Submit Photo button in the filter row (or the floating button at the bottom-left of the screen) to submit it for review. Accepted photographs are added to the User Submitted collection with full educational content developed by the SIAS team.
Accepted photographs stay out of the main gallery view — they live in the User Submitted collection so the default browse remains the curated corpus. They do surface in two places where you have asked a narrow question: filtering by an NGSS standard, or following a career cross-link. If you filter to K-LS1-1 or to “photos an ornithologist would study”, a submitted photograph that genuinely matches is a result, and it carries a Submitted badge on its card so you can see where it came from.
Classroom Strategy Guide
Here are proven protocols for integrating SIAS into different classroom contexts — from a 5-minute warm-up to a full station rotation. Each protocol is designed to work within real constraints: limited devices, limited prep time, and the full complexity of a K–5 classroom.
The lowest-prep, highest-impact use of SIAS. Requires only a projector and one class device. No printing, no accounts, no preparation beyond choosing a photograph.
- Open a photograph and enable the Sentence Stems overlay. Project on the board.
- Give students 2 minutes of silent observation and writing time — one sentence stem completed in their science notebooks or on a sticky note.
- Partner share for 1 minute.
- Click Hotspots to reveal labeled features. Bridge student observations to scientific vocabulary: "Several of you noticed this part. Scientists call this..."
Great for days when you want students independently engaging with phenomena while you pull small groups.
- Select 4–6 photographs from the same Storyline or category. Generate a QR code for each (Section 10).
- Print or display one QR code at each station, with a brief written prompt (e.g., "Scan, then write 2 observations and 1 question").
- Students rotate through stations, scanning each code and working in Student View.
- Close with a whole-class debrief: "Which photograph surprised you most? What patterns did you notice across all the stations?"
Turn a Storyline into the backbone of a science unit with minimal additional planning.
- Download the Storyline Teacher Guide for your chosen sequence (Section 11).
- Open Photo 1 of the Storyline. Use it as the anchor phenomenon for Day 1 — introduce the driving question that spans the sequence.
- Each subsequent class, open the next photograph in sequence. Use the Teacher Guide's "discussion connectors" to explicitly link it to the previous photograph.
- At the unit's end, return to the first photograph. Ask: "How has your explanation of this image changed since Day 1? What evidence do you now have?"
English Language Learner Supports
- Every photograph carries its own English Learner strategies, at the foot of the Lesson tab under Differentiation Tips. Filter them by proficiency band with the chips above the list — a class of newcomers narrows to Levels 1–2 rather than reading past what does not fit. Where a strategy supports one particular discussion question, it also appears beside that question on the Discussion tab, so you meet it while planning the question rather than after. Video lessons carry the same supports — the per-question EL markers and the Spanish-cognate marks on vocabulary work identically there.
- For the moves that recur across the whole library, print EL Strategies at a Glance from any photograph's Downloads tab (Section 08). One page, both languages, grouped by what each move is for. The research behind all of this is at /ell.
- Use the EN / ES language toggle (next to the grade buttons on any lesson) to give Spanish-speaking students and families the full lesson in Spanish. Science vocabulary is presented bilingually — the Spanish term with the English term in parentheses — so students build academic language in both languages from the same phenomenon.
- Enable Sentence Stems for all students — the visual anchor and pre-formed language structure lower the barrier to participation for EL students without singling them out.
- The Vocabulary section in Student View provides definitions and interactive flashcard practice, supporting independent EL work with grade-appropriate academic language.
- Visit /ell for a dedicated English Language Learner Strategies guide, including photograph-discussion structures designed specifically for EL instruction.
- Photograph-based phenomena inherently reduce text-load barriers and allow EL students to participate in observation and discourse from the same evidence base as all peers — visual literacy is a genuine equalizer.
Cross-Curricular Integration
- ELA — Use the phenomenon as a science writing prompt. Use the EDP (from the Downloads tab) as a structured writing frame for engineering reports.
- Mathematics — many photographs involve scale, measurement, data, and patterns that connect directly to math standards, and the Cross-Curricular section names the connection for each lesson.
- Visual Art — Each photograph supports visual literacy discussion: composition, perspective, light, color, and negative space. Ask students to sketch the phenomenon from a different angle or create a scientific illustration.
- Social Studies — Earth & Space Science photographs frequently carry geographic context for habitat, climate, and human impact connections.
Counting and Measuring From a Photograph
“Analyzing and interpreting data” is one of the eight science practices, and a photograph gives you real data without any equipment. The trick is choosing a representation that fits the question rather than making a graph for its own sake.
K–2 — categories you can count
- Count what's visible and sort it: how many animals, how many have wings, how many rocks are rounded vs. jagged.
- Build the graph with objects first — cubes, counters, or sticky notes in columns on the floor — before drawing one. Young students need to touch data before it becomes abstract.
- Then move to a tally chart or a picture graph. Grouping tallies in fives quietly builds place value.
- Ask the comparison question, not just the counting one: which group has more, and how many more?
3–5 — measures and spread
- Estimate with a reference object in the frame: if that fence post is about a metre, how tall is the drift?
- Scale and proportion — how much bigger is this than that, and how do you know?
- Use a scaled bar graph to compare categories and a line plot to show how a set of measurements is spread out. Students routinely confuse the two: bars compare groups, line plots show where values fall on a number line.
- By 5th grade, a line graph for anything changing over time — shadow length, plant height across a Storyline.
Useful questions in either band: What did you notice? How did you keep track? What patterns do you see? Would a different graph show something this one hides? What does your data let you claim?
Sending Science Home
Family connection works best as an invitation, not an assignment. Every photograph carries a Take It Home sheet in the Downloads tab (Section 08) built for exactly that: one page, in English and in Spanish, that asks a family to look at something together and talk about it.
The activity never calls for anything a family would have to buy or print — a window, a sidewalk, the sky, a kitchen sink, the child's own shadow. The sheet says so in its first line, in both languages, because the families this is built for are the ones most likely to assume they can't take part.
The part worth protecting is the box near the bottom: Ask Someone At Home. It is a question the child asks the adult, and it is deliberately one the family can answer and the school cannot — what someone knows about planting, weather, animals, tools they have used, or how their family marks the seasons. Nobody at home is asked to explain the science, and the sheet says that too.
Three things make this work: it goes home to every family whether or not it comes back, it is never graded, and a child who didn't do it can still take full part in the next lesson. What comes back — a grandparent's story about a flood, a photo from a walk — is often the best material in the unit. Give it two minutes at the start of the next lesson; if you never ask, the sheet quietly teaches students that what their family knows doesn't count here.
If you would rather send a link than paper, the Student View link or a QR code (Section 10) does the same job on a phone.
Projector & Whole-Class Display Tips
- Start always with Image Only mode — let students observe and speculate before any labels or overlays appear.
- Layer intentionally: Image Only → Hotspots → Discussion Questions → Sentence Stems. Choose one overlay per instructional moment rather than showing everything at once.
- Keep the grade selector visible in your browser so students and observers can see you're using grade-appropriate content.
- Use Previous / Next navigation to move through a Storyline sequence mid-class without closing and reopening — keeps momentum and student attention.
Teachers consistently report the highest student engagement when they display the photograph before naming what it shows — letting students construct understanding before confirmation. The phenomenon statement in the Lesson tab, revealed after 5 minutes of student thinking, becomes a satisfying "reveal" that validates student reasoning rather than short-circuiting it.
Facilitating Science Talk
A photograph is a conversation starter, and the conversation is where the learning happens. This section is about running that conversation: the agreements that make it safe to guess out loud, the three phases a science discussion moves through, and the moves that keep it going.
Start with Agreements, Not Rules
The whole SIAS routine — project a photograph, ask what students notice — depends on children being willing to say something they aren't sure about, in front of everyone, about a picture nobody has explained yet. That willingness isn't automatic. It is worth building deliberately, in the first week, with four agreements the class writes together and posts on the wall:
- We can do science in many different ways. Talking, drawing, gesturing, building, and writing all count as doing science.
- We share ideas even when we are not sure. This is the load-bearing one. A first look at a photograph has no right answer yet, and a class that waits for certainty says nothing.
- We look, listen, and respond to each other's ideas. Ideas are addressed to the class, not to the teacher.
- We let our ideas change and grow. Changing your mind because of evidence is the point, not a loss.
Write them with students rather than posting them finished. Ask what each one would look and sound like in your room, and record the answers in their words. Leave room for a fifth agreement the class adds later — that space is what turns the list from your rules into their promises.
The most useful moment to reread the agreements is right before students try an unfamiliar move for the first time — the first critique of a classmate's model, the first whole-class disagreement, the first time you ask them to change an answer they already gave. Thirty seconds of “which agreement will we need today?” buys a much better discussion.
The Three Phases of a Science Discussion
Whole-class science talk isn't one thing. It moves through three phases with different purposes, and knowing which one you're in tells you what to ask and what to accept as a good contribution.
Goal: get many ideas out, not the right one. Surface prior experience, find the gaps, raise the questions worth investigating.
You: collect and clarify; resist evaluating. Ask “who has a different way of thinking about this?”
Students: share, connect, ask each other questions.
Goal: put a new piece of evidence to work. What does this observation mean for what we thought?
You: press for evidence and reasoning. Invite alternative explanations.
Students: make claims, cite what they saw, compare findings.
Goal: assemble the pieces into a shared explanation — and name where you still disagree.
You: take stock, revise publicly, press toward a common account.
Students: agree, disagree, defend, and decide what's still missing.
A single photograph can carry all three in one period, or you can spread them across a Storyline, with the consensus discussion arriving at the end of the sequence.
Language for each phase
The Sentence Stems overlay above any photograph gives students the words. It carries three sets, matching the three phases — switch between them with the tabs at the top of the overlay:
- Observe & Wonder — “I notice ______, and I wonder ______.” Use in Phase 1.
- Share Evidence — “I think ______ and my evidence is ______.” Use in Phase 2.
- Agree & Decide — “I agree because ______” / “I disagree because ______.” Use in Phase 3.
All three sets are available in English and Spanish, and the Discussion Stems PDF in the Downloads tab prints all twelve on one page for student desks or notebook covers.
The stems give students language. The Talk Moves PDF gives you eight: Elicit (“can you say more?”), Probe (“what makes you think that?”), Restate, Reason, Challenge, Connect, Wait, and Synthesize — each with when to use it and why it works. Print it once; it isn't photo-specific.
Sit in a Circle
When students sit in rows facing the board, the teacher is the audience for every idea, and the implicit message is that you are the one who knows. When they sit in a circle — on the rug, in chairs, or standing around the perimeter — they can see and talk to each other, and ideas start being addressed to the class.
This matters more with SIAS than it might seem, because the photograph is usually projected behind you. Consider putting the image on a screen students can turn toward, then bringing the class into a circle for the discussion itself, rather than keeping everyone facing forward for the whole period. Practise forming and leaving the circle a few times so it costs you seconds, not minutes.
Getting More Voices In
- Think time before public time. Turn-and-talk, a minute of silent writing, or a small-group huddle before the whole-class share. The pace of an unplanned discussion systematically favours the students who are fastest, not the ones who are deepest.
- Ask for a different modality. “How could you show that with your hands?” “Could you draw it?” “How would you say that in another language?” A student who can't yet phrase an idea in English can often gesture it precisely.
- Track who has spoken. A sticky note with a class list and a tally is enough. Over a week the pattern is usually surprising.
- Let them move. Turn “turn and talk” into “stand and talk.” For either/or questions, have students walk to one side of the room; for three or four options, to the corners. You get a visible poll and they get out of their chairs.
- Don't ask every question. The prompts in the Discussion tab are a menu, not a script. When the class has landed the key idea, move on.
The Driving Question Board
A Driving Question Board is a piece of chart paper where the class's own questions live for the length of a unit. Students write a question on a sticky note, read it aloud, and post it. As investigations answer questions, they get moved, annotated, or marked with the evidence that settled them.
It works especially well with SIAS because the photographs generate questions faster than any single lesson can answer them. To start one:
- Project a photograph and run the Start with Wonder band (Section 07). Its “questions students might post” list is written in kid voice precisely so you can show an example without putting words in their mouths.
- Give every student a sticky note and two minutes. One question each, in their own words.
- Read them aloud as they go up. Group the ones that are asking the same thing.
- Circle the two or three the class will investigate first. Leave the rest posted.
- Return to the board at the end of each lesson: what did we just answer, and what did that raise?
When a question is bigger than the lesson
Students will ask things a photograph cannot answer, or that belong to a much later grade. Post them anyway. Telling a child their question is off-topic teaches them to stop asking; the more honest response is that scientists generate more questions than they answer, and that not knowing yet is the normal condition of science rather than a failure.
At the end of a unit, celebrate what the class figured out and then read the unanswered questions aloud. Ask how they might find out — at home, at the library, from someone in the community, or in a later grade. Some teachers build a fresh board from the leftovers at the end of the year.
Assessing with SIAS
Assessment here means finding out what students think so you can teach them, not generating a grade. Most of what you need is already sitting in the Downloads tab of every photograph — this section maps the pieces onto the moments you'd actually use them.
Five Moments, and What to Reach For
Before and during
- Pre-assessment — the Start with Wonder band and the Notice and Wonder T-chart. What students notice first, and what they already call things, tells you where to begin.
- Formative — the Evaluate phase of the 5E lesson, the Exit Ticket, and the Quick Check Probe for a specific misconception.
After
- Summative — the Rubric (grade-specific), or the rubric inside the Writing Packet for a longer piece.
- Benchmark — at fifth grade, the Grade 5 Benchmark: one 32-question assessment across all three science domains. See below.
- Self-assessment — the Self-Reflection sheet. Don't grade it; it's thinking space.
- Peer feedback — the consensus stems from Section 16 give students the words to respond to each other's explanations.
A Simple Three-Level Read
When you want to judge an explanation quickly — spoken, drawn, or written — three levels are enough. This works for any photograph at any grade:
- Beginning — draws on everyday experience and on what was observed, but the pieces stay separate.
- Developing — draws on experience and observations, and begins connecting them to explain part of what's happening.
- Secure — connects observations, a science idea, and a pattern or cause into an explanation of the phenomenon, and may start applying it to a new case.
Notice that “Secure” is not “used the right vocabulary.” A student who explains the mechanism in plain words is secure; a student who says condensation without being able to say what happened is not.
What to Say Back
The useful question after reading student work isn't what score it earns, it's what to invite next.
Invite them to connect two things they already have: “You noticed ______ and you also said ______ — could those be related?” Point them back at their own earlier work.
Problematize it. Pose the case their current explanation doesn't cover, and let the gap do the teaching. Ask what evidence would settle it.
Push outward, not harder. Does the explanation hold for a different photograph? Where have they seen this near home?
Science Notebooks
A notebook is the cheapest assessment tool you have, because it shows change over time. Whatever form it takes — a composition book with handouts taped in, a pronged folder, a binder, or a digital doc — the point is that a student can look back at what they thought three weeks ago.
- K–2: a pronged folder is usually easiest. Drawing counts as writing; scribe what a child tells you about their picture and read it back to them.
- 3–5: a bound notebook students paste into. Don't distribute a unit's handouts all at once — several of them reveal what students are meant to figure out.
- Either: circulate and read while they write rather than collecting and marking. What you learn in those two minutes changes tomorrow's lesson; a stack of marked books next week does not.
The Grade 5 Benchmark
Everything above is formative — small, fast, aimed at one idea. The Grade 5 Benchmark is the exception: a single 32-question assessment that spans life science, earth and space science, and physical science, built on SIAS photographs. It appears in the Downloads tab of every fifth-grade photograph, and it is the same assessment each time. It is not about the photograph you happen to have open.
Use it wherever it is useful — at the start of the year to find out what students bring with them, as a pre-test before a unit sequence, as a mid-year check, or at the end of the year. The questions do not change; only what you conclude from the results does.
Why a fifth grade test contains third and fourth grade questions
Sixteen questions assess fifth-grade performance expectations, seven assess fourth grade, and seven assess third grade. That is deliberate. A fifth grader's science understanding is not built only from fifth-grade content, and a low score tells you far more when you can see which year's ideas are shaky. In September the third- and fourth-grade questions show you what students actually carried forward; in May they show you what stuck. The answer key reports all three bands separately for exactly this reason.
What you get
- Benchmark Test — the clean assessment students sit. Every photograph appears with all of its questions on one page, so nobody has to turn back to see the picture they are answering about.
- Annotated Sampler — the same questions, each followed by the answer, the standard, the practice and crosscutting concept, and a note on what every wrong choice tells you. A planning document, not a student handout.
- Answer Key — the answers, a class reporting grid that separates gaps by domain and by grade level, and a per-student profile sheet showing strength across the three sciences.
- Google Form — the same assessment, self-scoring. Online only; it does not appear in the desktop app.
There is a suggested stopping point partway through, so the test splits into two sittings of roughly thirty minutes without separating any photograph from its questions. The last two questions extend into engineering design and a written explanation; skip that section and you still have a complete, machine-scorable 30-question assessment.
The Google Form button opens an editable copy of the quiz — grading, correct answers and feedback included. Click it once to put your own copy in your Drive, then assign that copy to students and share responses with yourself. Never give students the link from this page: it would hand them the answer key.
The benchmark is modelled on the item formats used in current state science assessments — a photograph followed by a cluster of questions, with several answer formats rather than only multiple choice. No question, passage or image is reproduced from any released test. Every photograph is one of Alex's, and every question was written for this assessment.
The Self-Reflection sheet, the Notice and Wonder T-chart, and notebook thinking pages are all spaces where a student should feel free to be wrong. Grading them teaches students to write what they think you want, which is precisely the opposite of what a phenomenon-driven lesson needs.
Planning & Pacing
Elementary science time is whatever is left after everything else, and it varies enormously — twenty minutes daily in one school, an hour on Fridays in another. This section is about fitting SIAS into the time you actually have.
Three Honest Cadences
- Ten minutes, most days. One photograph, the Sentence Stems overlay, two minutes of writing, a partner share. Over a week that's a real routine and students get noticeably better at observing. This is the highest-return option if your science time is fragmented.
- One period a week. Run a full Lesson tab: phenomenon, an Explore activity, discussion questions, vocabulary, exit ticket. One photograph carries the whole period without extra planning.
- Two or three periods a week. Now a Storyline or a Six-Week Unit works as designed — a connected arc rather than a series of one-offs.
Borrowing Time From Elsewhere
Much of a science lesson is legitimately literacy and mathematics, and can be taught in those blocks without shortchanging either subject:
- Literacy block — read the phenomenon statement aloud as an informational-text read-aloud; use the Writing Packet during writing workshop; the vocabulary routine is word study.
- Morning meeting or closing circle — the opening “what do you notice?” and the closing “what did we figure out?” both fit a circle format naturally.
- Math block — any counting, measuring, or graphing the photograph supports (see Section 15) is real math work with a real context.
The first few photograph discussions run long, and it feels like the routine doesn't fit. That's students learning how to do this, not a pacing problem. Once a class knows how to notice, turn and talk, and share out, the same lesson takes noticeably less time. Give it three or four rounds before you decide it doesn't fit your schedule.
If Your District Uses a Storyline Curriculum
SIAS is a supplement, not a replacement, and it slots into a storyline curriculum cleanly. If your school teaches a phenomenon-driven program built around storylines, here is roughly how the vocabulary lines up:
- Anchoring Phenomenon Lesson — a SIAS photograph works well as the anchor image, with the Start with Wonder band and a Driving Question Board.
- Investigation Lesson — the 5E Explore and Explain phases map onto this most closely.
- Putting Pieces Together — the 5E Elaborate and Evaluate phases, plus the consensus discussion from Section 16.
At the component level: Navigate is the return to the Driving Question Board; Explore is the 5E Explore; Connect is the cross-curricular and STEM-career material at the end of every Lesson tab; Synthesize is the 5E Evaluate. Used this way, a SIAS photograph is a second phenomenon for a unit that needs one, or a five-minute warm-up that keeps a storyline's question alive between sessions.
Sensitive Photographs
Science photographs include storms, floods, wildfires, eroded coastlines, and dead or injured animals. Because SIAS is a gallery you browse rather than a fixed sequence, you can arrive at one of these without warning — and so can a child who has lived through it. Two-thirds of children experience at least one traumatic event before they turn sixteen, and weather and hazard topics are among the most common triggers in an elementary science class.
This isn't a reason to avoid those photographs. Connecting science to real life is the point. It's a reason to have a response ready.
Three Steps, in Order
- Be curious. Ask what the experience was like for them rather than telling them how it must have felt. What makes an event traumatic is the child's response to it, not the event itself — and a child who is fine may be made anxious by being told they should be frightened.
- Validate. Reflect back a short summary of what they said, then say why it makes sense. “It sounds like you and your family were really scared when the warning came. That makes a lot of sense — I know other people who felt that too.”
- Thank them. Thanking a student for sharing tells the whole class that bringing their life into science is welcome. “Thank you for telling us that.”
Instead of…
- “That must have been really scary for you.”
- “I would have felt so worried.”
- “You must have been terrified!”
Try…
- “What was that like for you?”
- “Can you use our feelings chart to show how you felt?”
- “I can imagine having a lot of feelings about that.”
If what a student is sharing may distress the rest of the class, use the same three steps but lean on validating and thanking rather than asking follow-up questions, and check in privately afterwards. If a child becomes visibly dysregulated — crying, shaking, going blank — send them to your counsellor rather than working through it in the moment. If you notice a trauma response in a student who hasn't spoken up, find them one-to-one after the lesson and say what you saw.
Hearing children's hard stories accumulates. Irritability, trouble concentrating, numbness, intrusive thoughts, and disrupted sleep are all signs of compassion fatigue, and they are an occupational reality rather than a personal failing. Talk to colleagues, and use the same supports you'd point a student toward.
Frequently Asked Questions
Yes. Every lesson has an EN / ES toggle next to the grade buttons. Switching to ES re-renders the photo description, phenomenon, discussion questions, and vocabulary in Spanish, at whatever grade level you're viewing. It works on photo lessons, video lessons, and the Student View, and new photos and videos are translated automatically as they're added. Science terms are shown bilingually (Spanish with the English in parentheses). NGSS codes and standards text stay in English so they match your standards documents. The translations are AI-generated, so a quick review before relying on a lesson is wise.
Because some photographs genuinely teach two sciences, and each one gets its own lesson. A pond is a habitat if you're looking at what lives in it, and it's fresh water sitting on the Earth's surface if you're looking at where water goes. Rather than bolt a second set of standards onto one lesson, SIAS builds a second lesson: different discussion questions, different standards, different worksheets and PDFs, written for that discipline. Look for the “Also taught as…” link near the photo's title — it moves you between the two. If you've already taught the photo one way, the other version is usually worth opening: your students will recognize the picture instantly, which makes it a good bridge into a topic that would otherwise start cold.
No. Student View is completely anonymous — no login, no email address, no account of any kind. Students just need the URL or a QR code. Nothing they do on the student page is tracked or stored with any personally identifiable information.
Not to read. Every lesson, discussion question, standard and Student View is open on screen without an account. A free Google sign-in is asked for when you download a PDF or ZIP, save to Drive, export to Slides or Docs, save favorites to My Collection, submit a photograph, or leave a comment. It never unlocks content that isn’t available to all users.
Any device with a modern web browser — Chromebooks, iPads, Android tablets, Windows laptops, and Mac computers. Student View is fully responsive for smartphone screens as well. No app download is ever required.
Two ways. On the website, recently viewed pages are cached by the site's service worker and may load without a connection for a limited time after your last visit — a reliable internet connection is still recommended, particularly the first time you open any photograph. For true offline use, the SIAS desktop app (Mac and Windows) bundles the full gallery and every lesson resource, works with no internet connection at all, and refreshes its content automatically whenever it is back online.
Type the standard code into the search bar (e.g., 1-LS1-1, ESS2-1, 3-PS2). An autocomplete dropdown surfaces matching standards — select one to filter the gallery to every aligned photograph. You can also type just the DCI abbreviation (e.g., LS1, ESS2) to browse all photographs touching that core idea.
New photographs, Storylines, and features are added throughout the year — both through editorial additions by the SIAS team and through teacher-submitted photographs that pass content review. Check the Blog (accessible from the filter row) for announcements of new content.
All content aligns to Next Generation Science Standards (NGSS). If your state has adopted NGSS or an NGSS-informed framework (the majority of U.S. states have), alignment is direct. Check the Standards tab on any photograph to see specific DCI, CCC, and PE codes, and cross-reference with your state's published framework document as needed.
Yes. The Vocabulary section in Student View includes both a Flashcard Mode (flip through term + definition cards) and a Match Game (drag terms to match definitions). Both modes use the same grade-level vocabulary that appears in the Lesson tab's vocabulary section.
Yes — Student View links are appropriate to share with families for home exploration. Use the Copy Attribution button to include proper source credit if you're incorporating photographs into a newsletter or take-home packet.
Use the Contact link in the site footer to reach the SIAS team. For quick troubleshooting, try refreshing the page, clearing your browser cache (Ctrl+Shift+R or Cmd+Shift+R), or opening in a different browser. Most issues resolve within seconds of a hard refresh.
Sources & Further Reading
The instructional design behind SIAS draws on published frameworks and research. If you are building a case for adoption, evaluating alignment, or simply want to read further, these are the sources the practices in this handbook rest on.
Standards & Frameworks
- National Research Council (2012). A Framework for K–12 Science Education: Practices, Crosscutting Concepts, and Core Ideas. Washington, DC: The National Academies Press. — the source of the three-dimensional structure used throughout the Standards tab.
- NGSS Lead States (2013). Next Generation Science Standards: For States, By States. — the performance expectations, DCIs, SEPs, and CCCs every photograph is aligned to.
- Arkansas Department of Education. Arkansas K–5 Science Standards. — the standards the Six-Week Units are built on (Section 11).
Phenomenon-Driven Instruction
- Reiser, B. J., Novak, M., & McGill, T. A. W. (2017). Coherence from the Students' Perspective: Why the Vision of the Framework for K–12 Science Requires More than Simply "Combining" Three Dimensions of Science Learning. — why a lesson should make sense to students, not only to the teacher.
- Schwarz, C., Passmore, C., & Reiser, B. J. (2017). Helping Students Make Sense of the World Using Next Generation Science and Engineering Practices. NSTA Press. — the distinction between figuring out and learning about that shapes the Start with Wonder band.
- Cartier, J. L., Smith, M. S., Stein, M. K., & Ross, D. K. (2013). 5 Practices for Orchestrating Task-Based Discussions in Science. NCTM. — anticipating, monitoring, selecting, sequencing, and connecting; the planning behind Section 16.
Question Design & Cognitive Demand
- Anderson, L. W., & Krathwohl, D. R. (Eds.) (2001). A Taxonomy for Learning, Teaching, and Assessing: A Revision of Bloom's Taxonomy of Educational Objectives. — the Bloom's levels labelled on every discussion question.
- Webb, N. L. (1997). Criteria for Alignment of Expectations and Assessments in Mathematics and Science Education. CCSSO. — the Depth of Knowledge levels shown alongside them.
Access & Inclusion
- CAST (2018). Universal Design for Learning Guidelines, version 2.2. udlguidelines.cast.org — the engagement, representation, and action-and-expression principles behind the UDL strategies in every lesson.
- Lee, O., & Stephens, A. (2020). English Learners in STEM Subjects: Contemporary Views on STEM Subjects and Language with English Learners. — language development and science learning as one process rather than two, which is why vocabulary is introduced after the idea (Section 07).
- Substance Abuse and Mental Health Services Administration (2014). SAMHSA's Concept of Trauma and Guidance for a Trauma-Informed Approach. — the safety, trustworthiness, and peer-support principles behind Section 19.
Citing This Handbook
Jones, A. (2026). Science In A Snapshot Teacher Handbook (2026 Edition). Retrieved from sciencesnapshot.com/handbook
SIAS content is free to use in your classroom. For reuse beyond it, see the Copyright & Terms of Use page, and use Copy Attribution in any photograph's modal footer to get a formatted citation for that image.
The frameworks above shape the structure of every lesson — the 5E arc, the three-dimensional alignment, the question labelling, the UDL strategies. The per-photograph text itself is AI-generated against that structure and reviewed by the SIAS team. It is good, and it is not infallible: read a lesson before you teach it, exactly as you would with any resource you didn't write yourself.
One thing in a lesson is a claim about the world rather than teaching text, and it is pinned to a source rather than left to the AI: the salary in the STEM Career Connection is the median wage for a named U.S. occupation, taken from the Bureau of Labor Statistics.